
Create & send an agreement
Send a contract for e-signature and track it to signed — a four-step wizard, all inside the project.
- 1
Open the project
Start from the project.
- Navigate to Management System → Projects in the left sidebar.
- Click the project row to open its details page — where agreements, contacts, invoices, and activity live.
app.stageory.com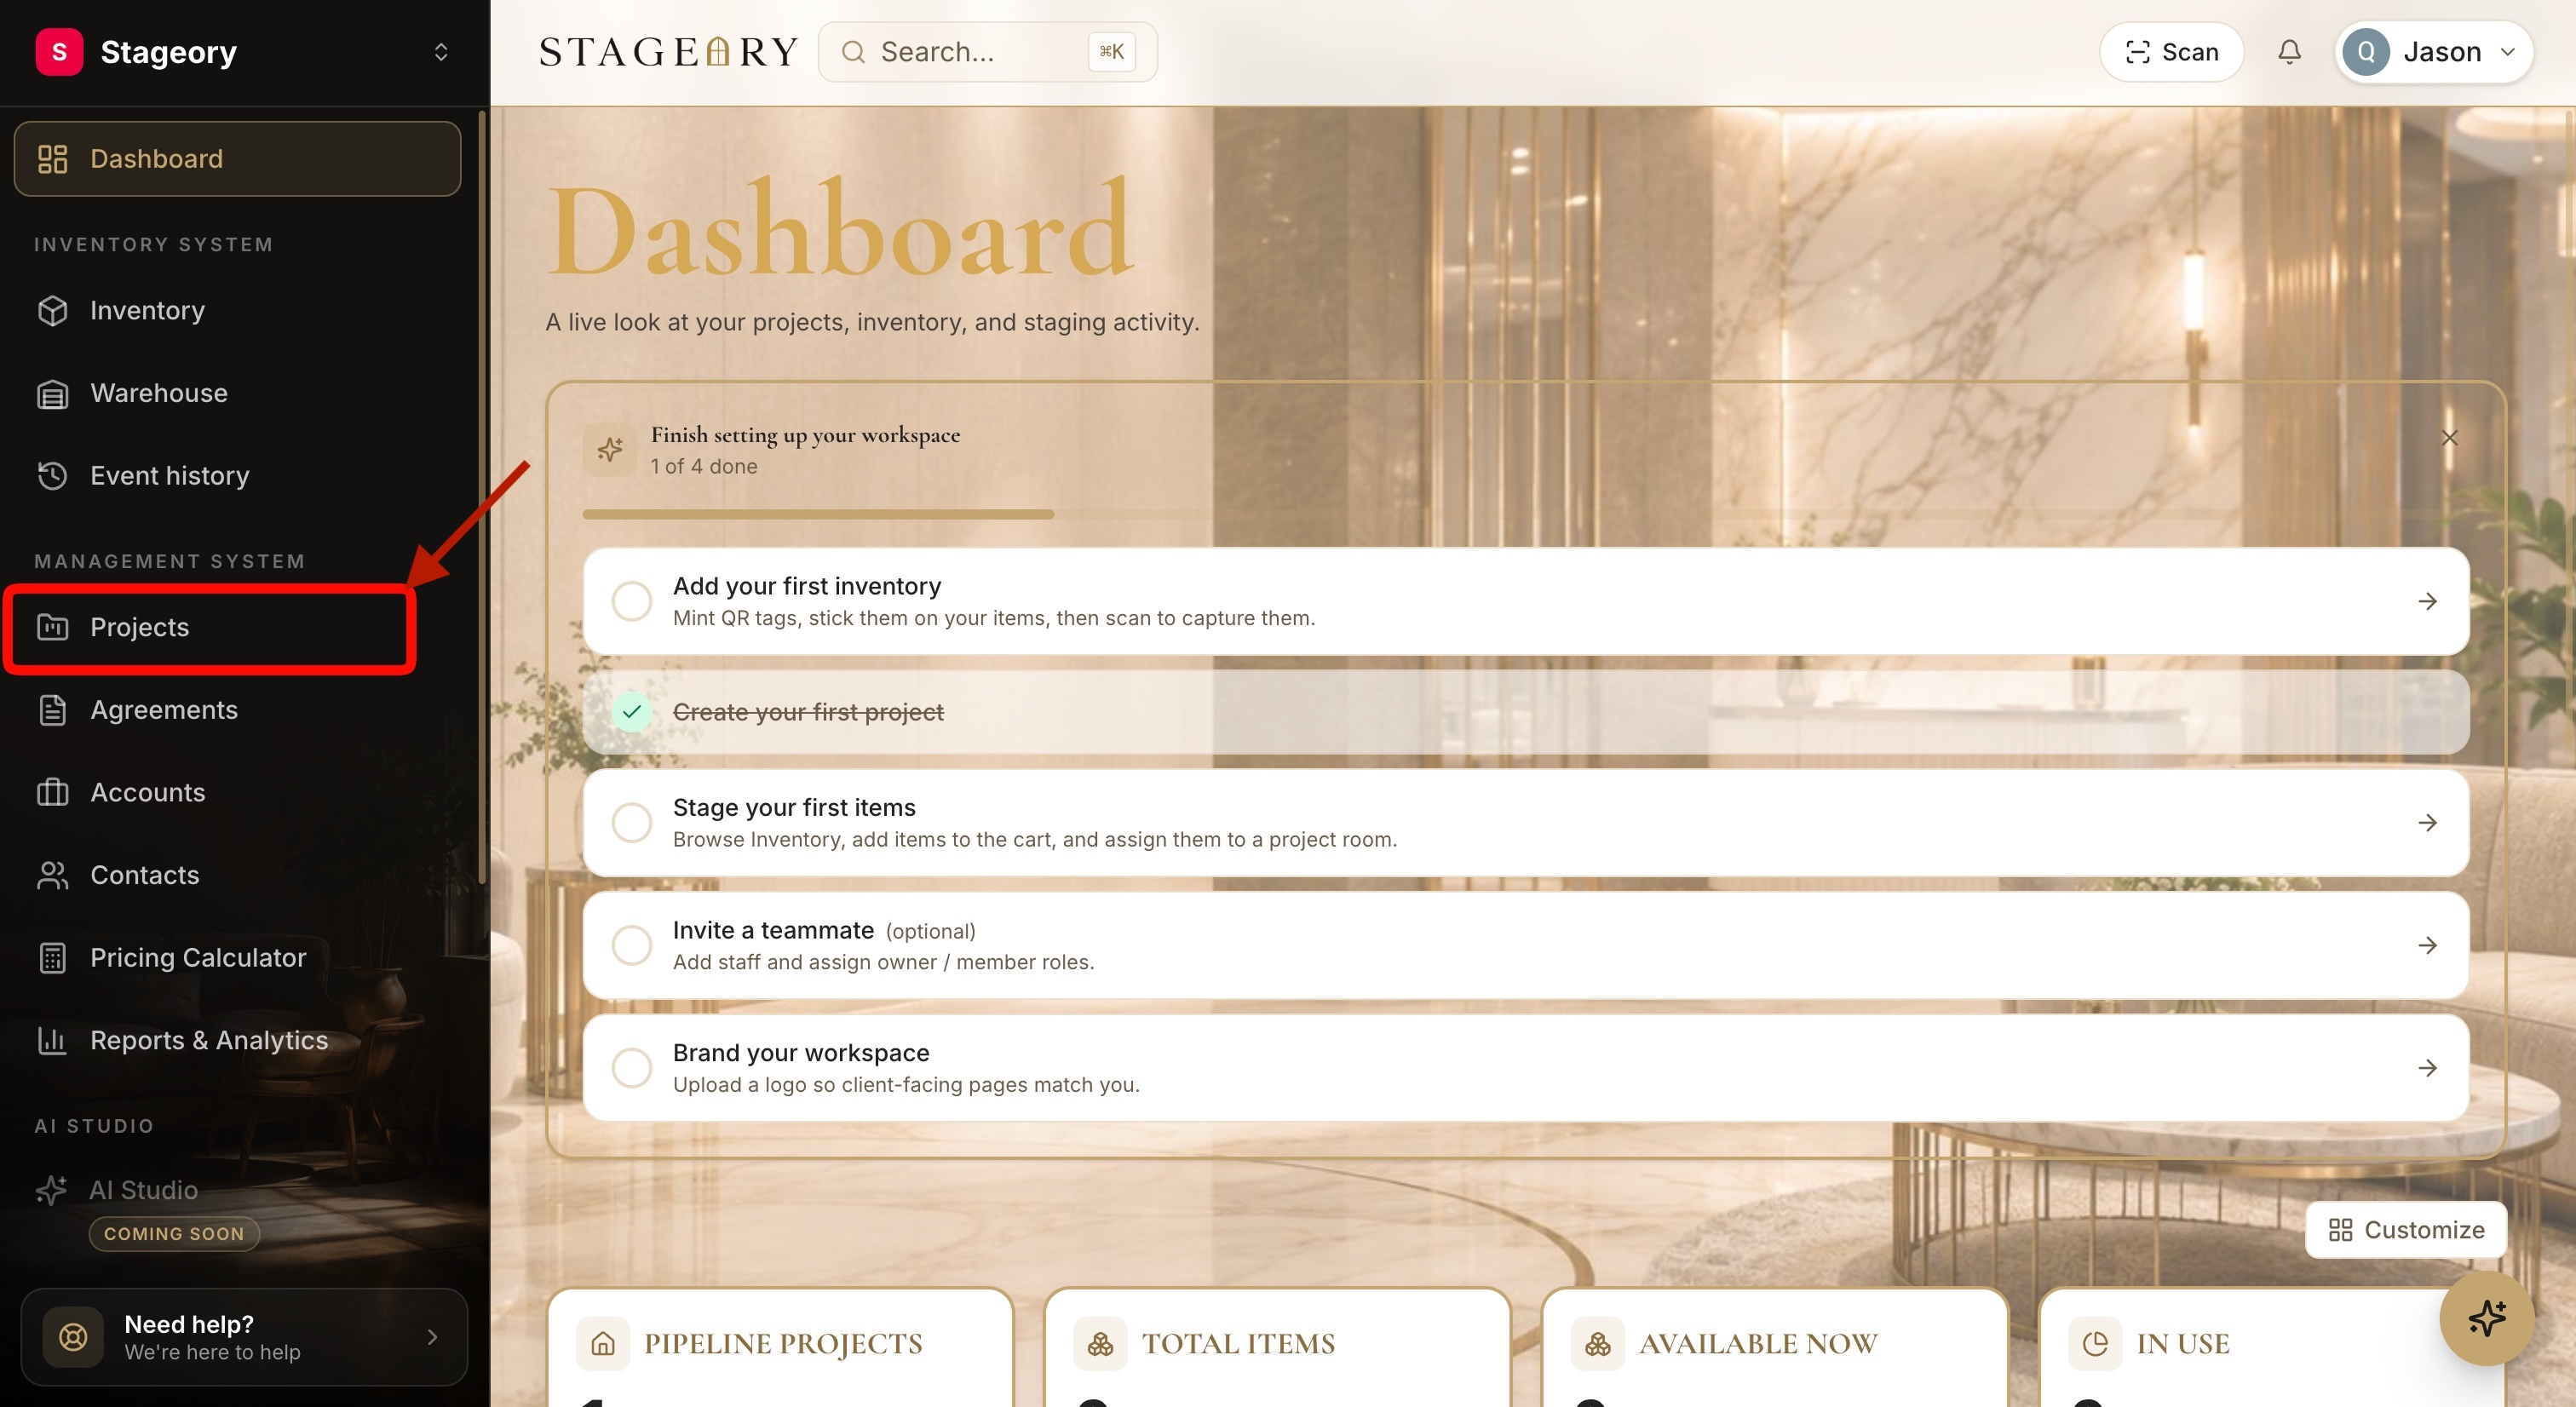
- 2
Open the project details page
The project workspace.
- You land on the project workspace.
- From here you manage inventory, contacts, calendar, invoices, agreements, and activity.
app.stageory.com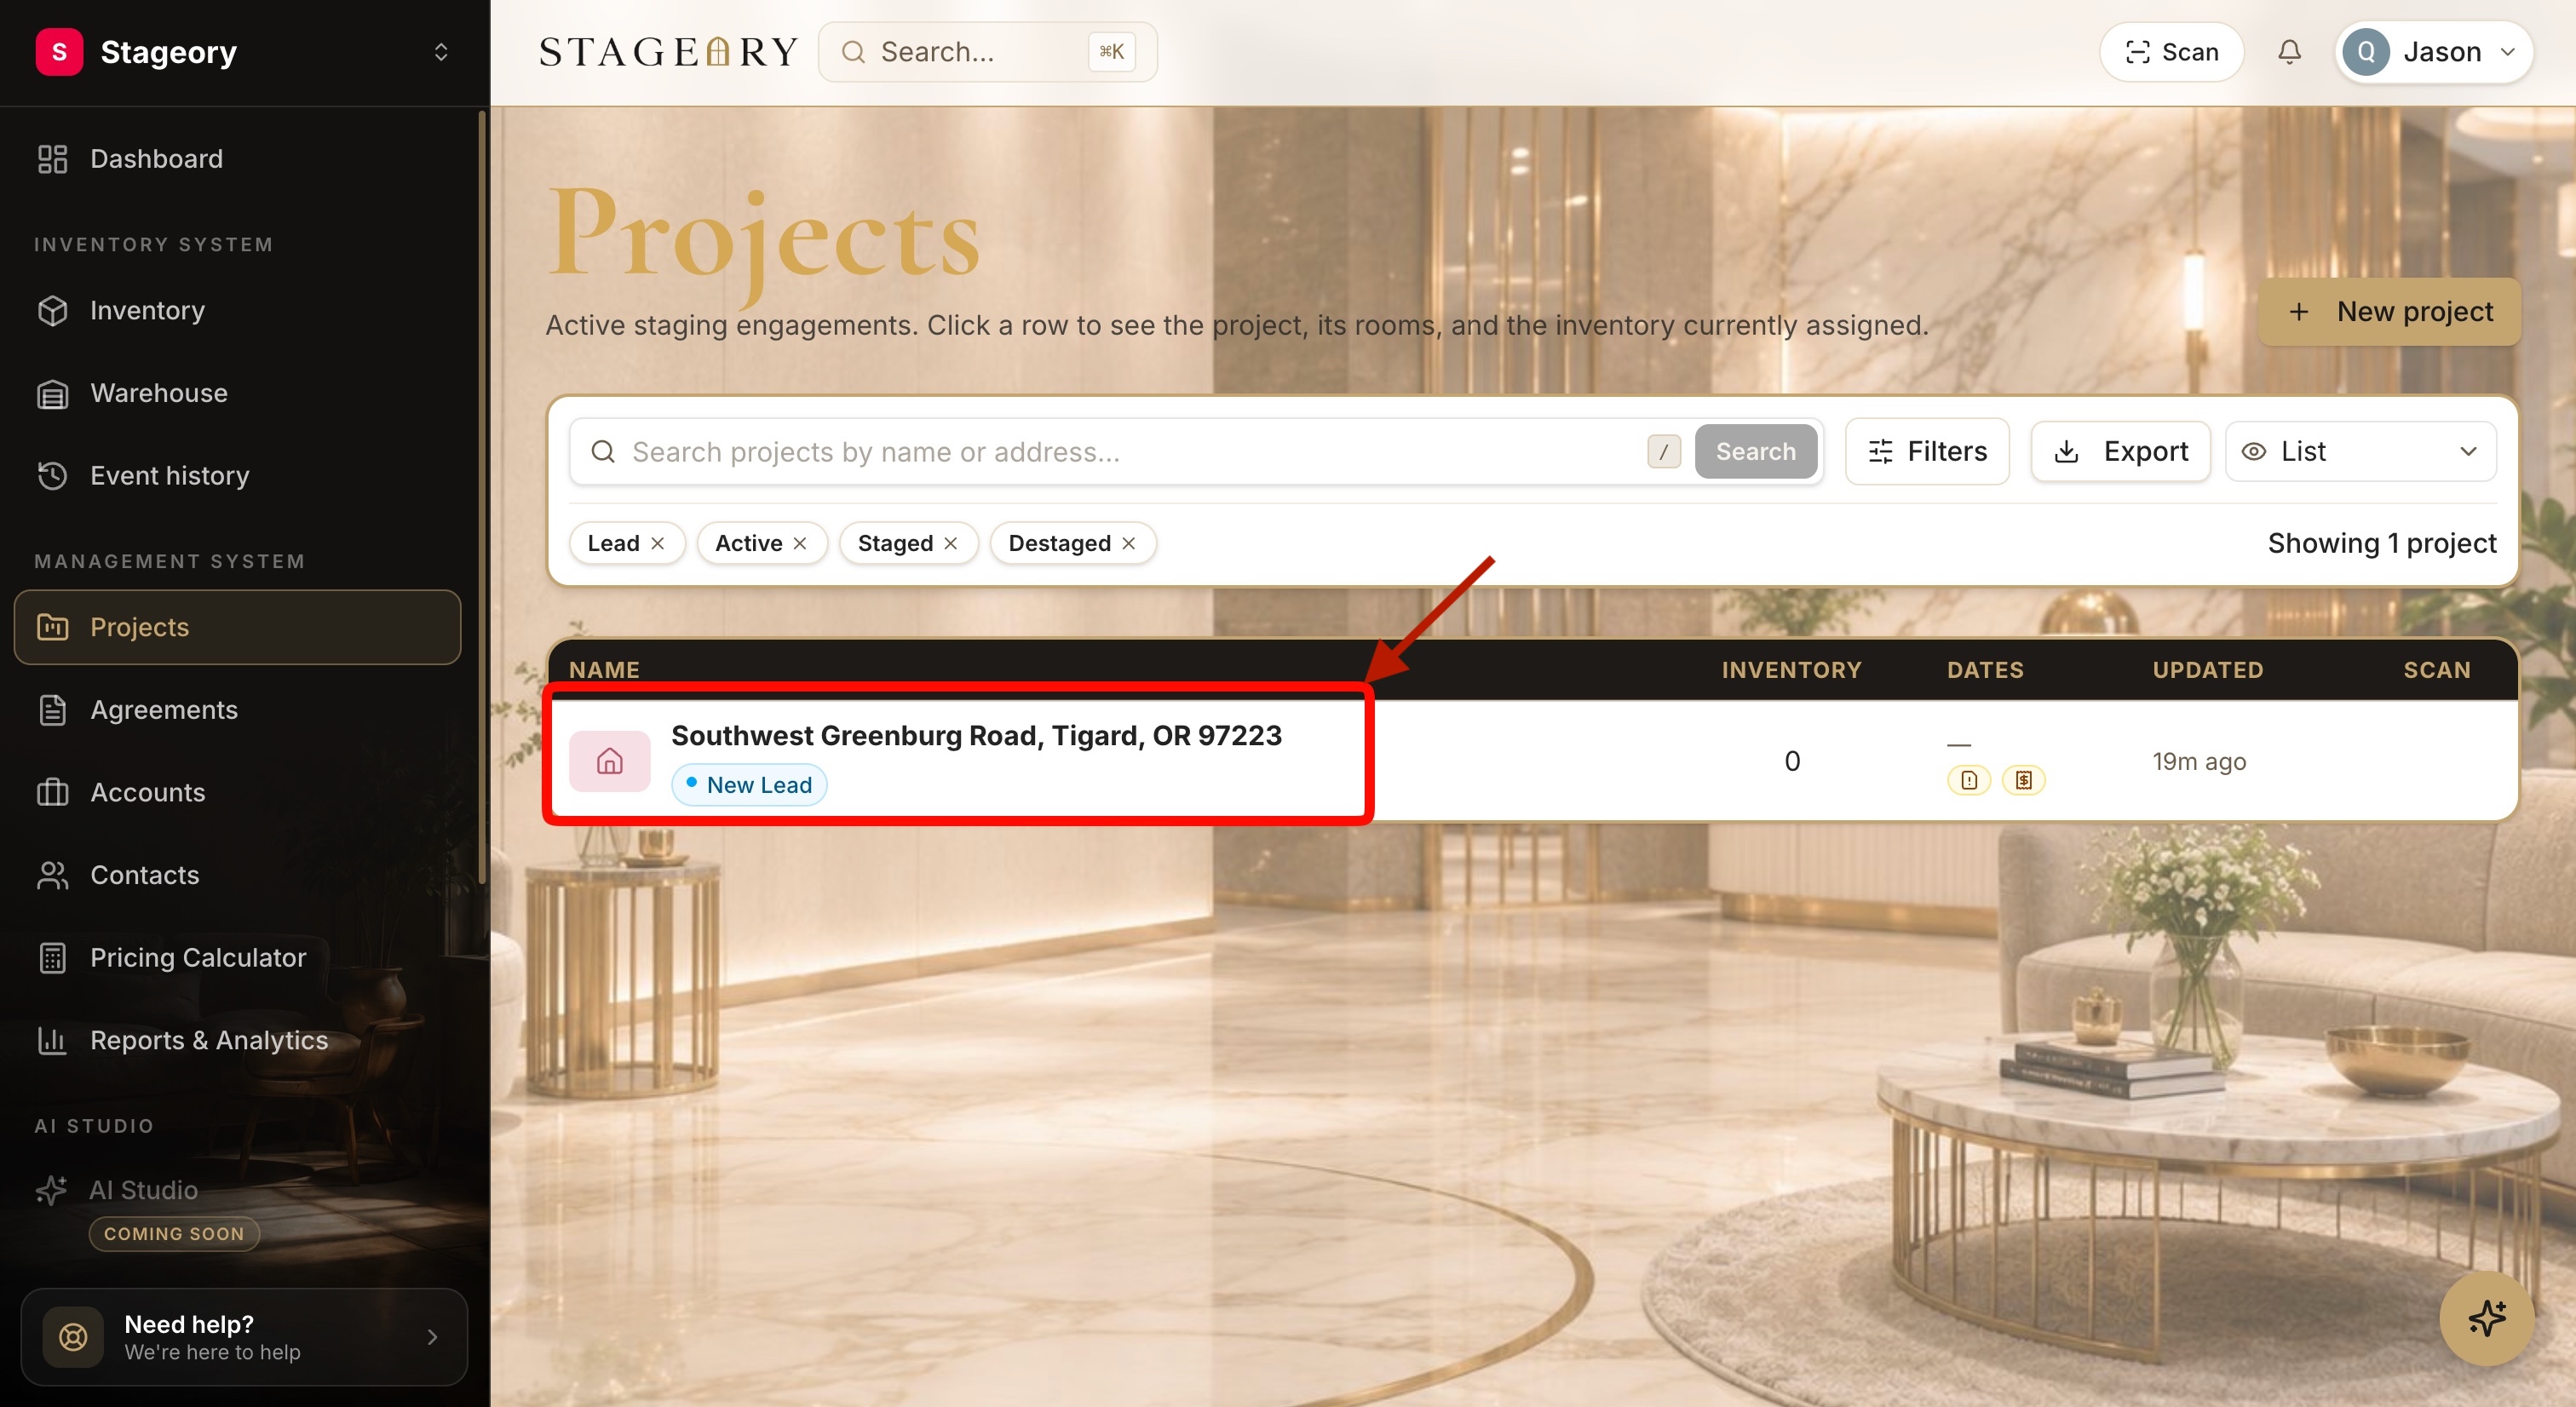
- 3
Open the Agreements tab
Where documents get signed.
- Select the Agreements tab from the project navigation.
- This section prepares documents, collects signatures, and tracks status.
app.stageory.com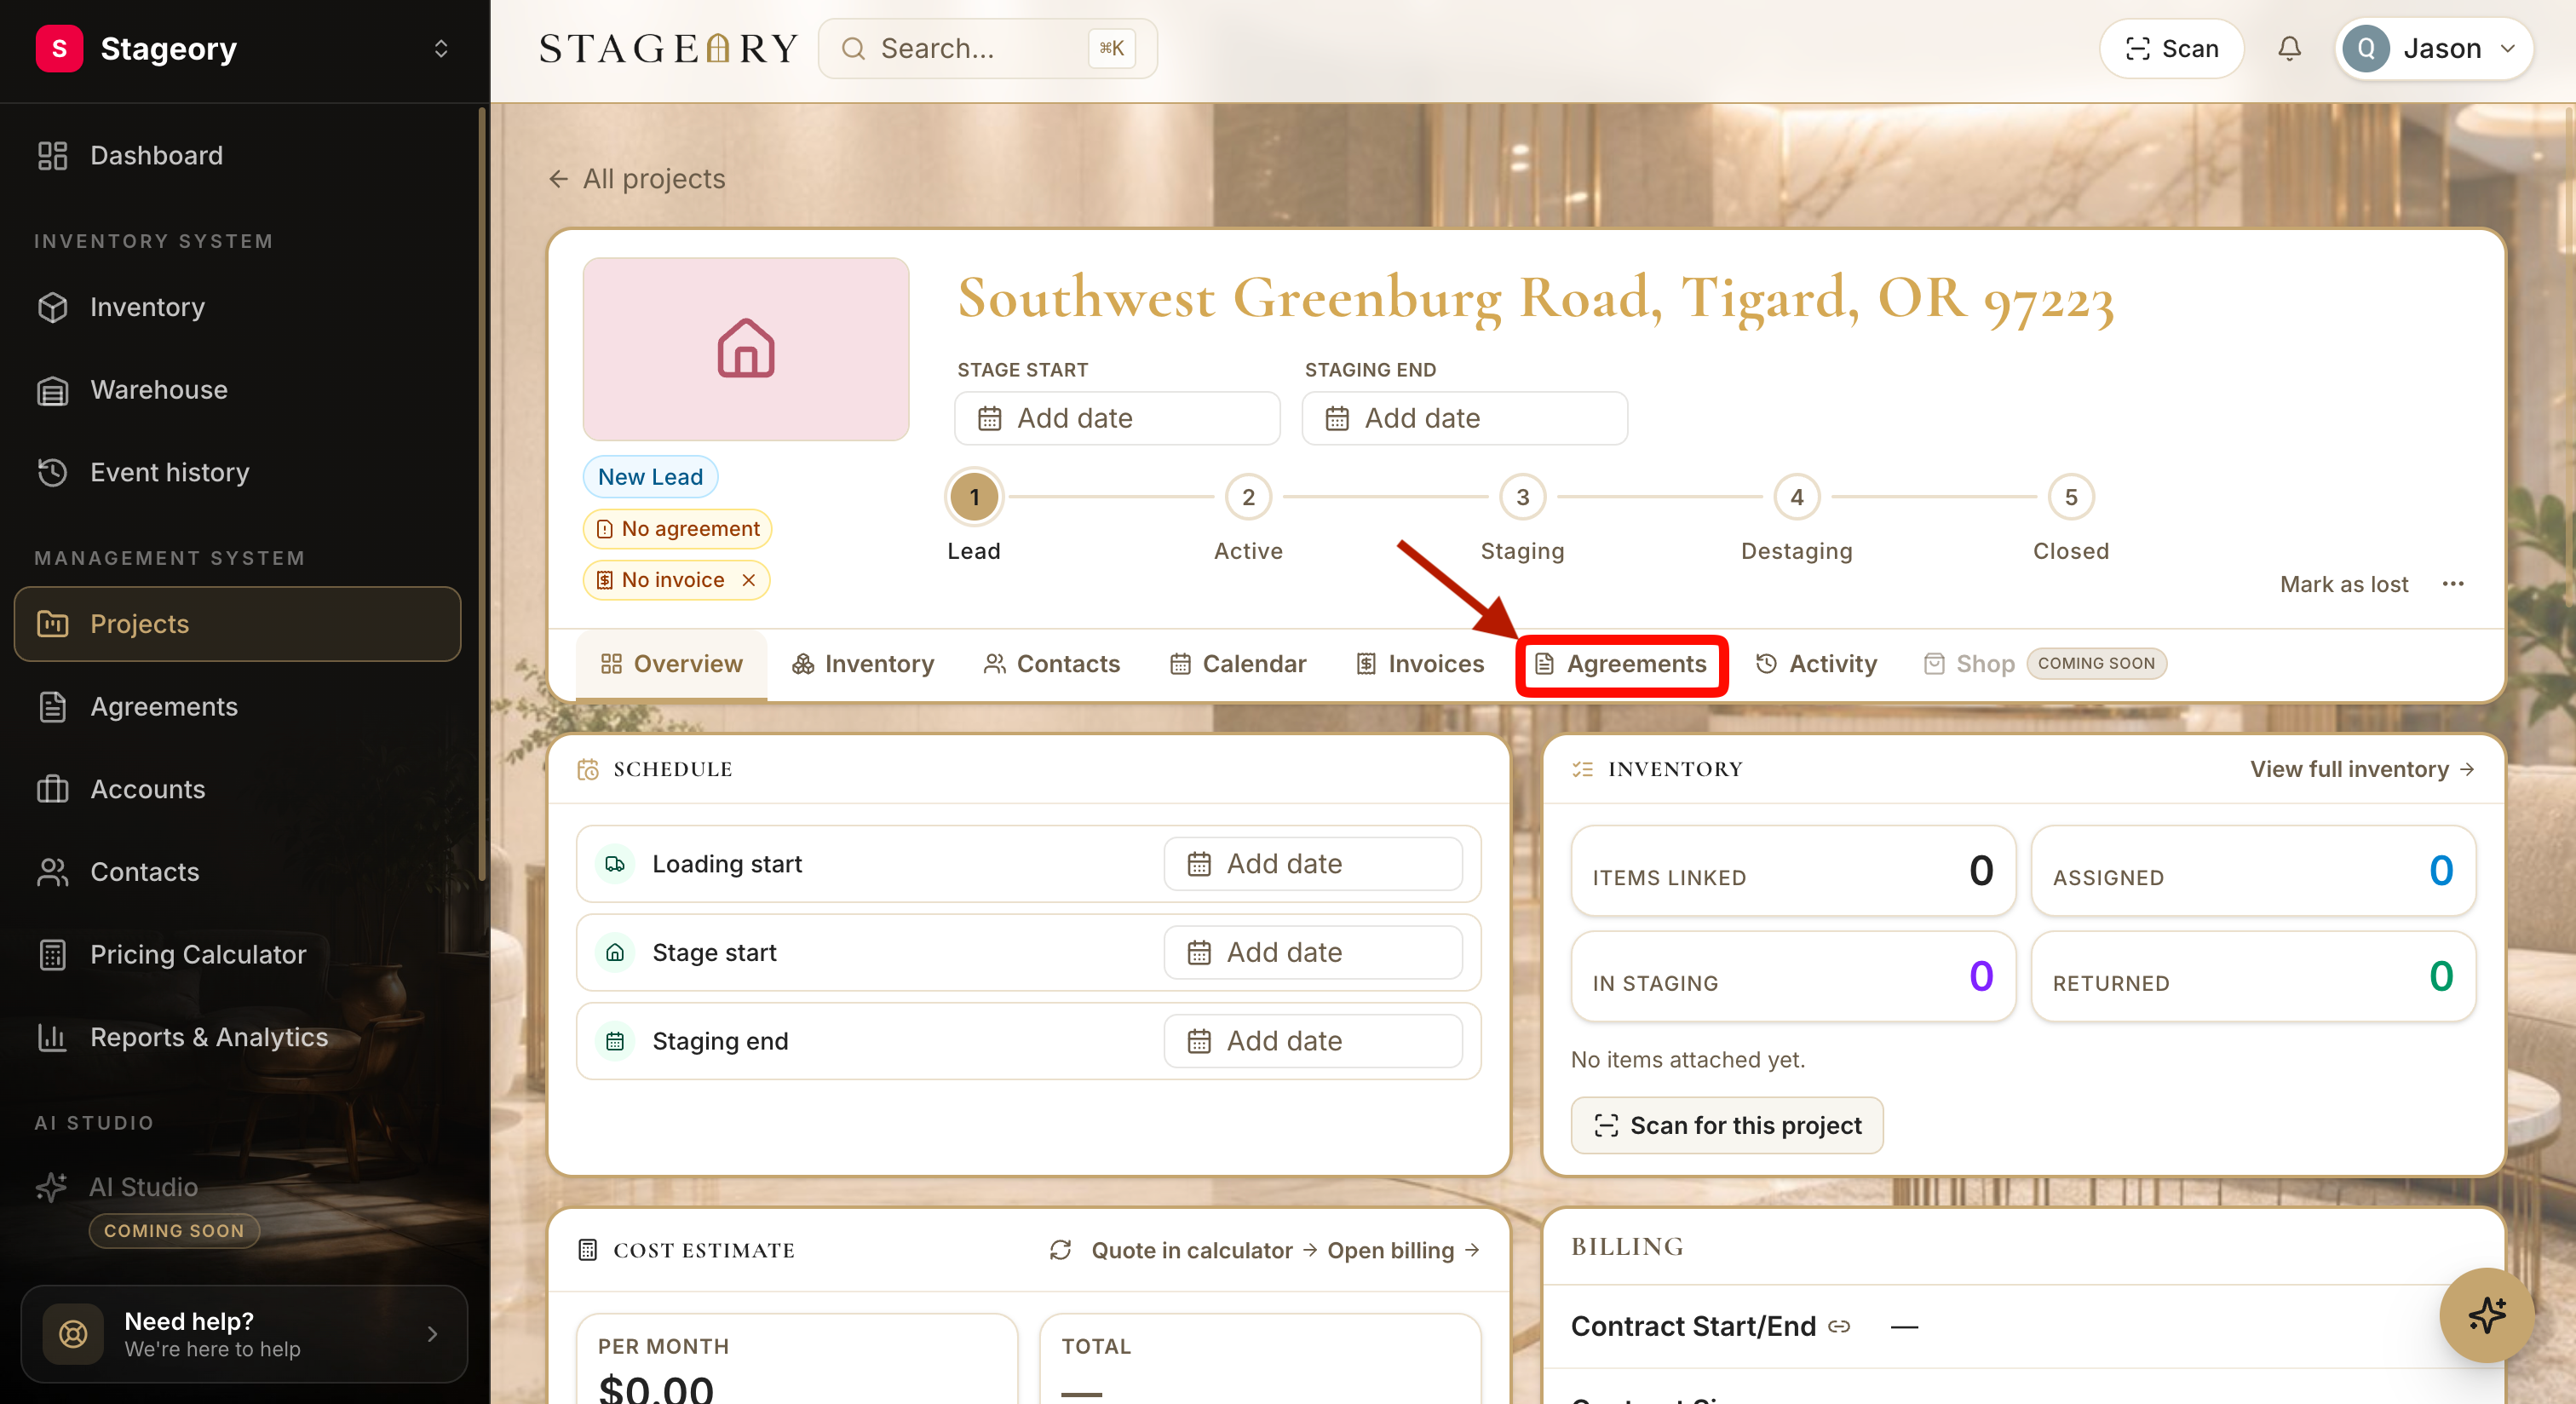
- 4
Create a new agreement
Start the e-sign workflow.
- Click New Agreement.
- Stageory guides you through a four-step e-signature process.
app.stageory.com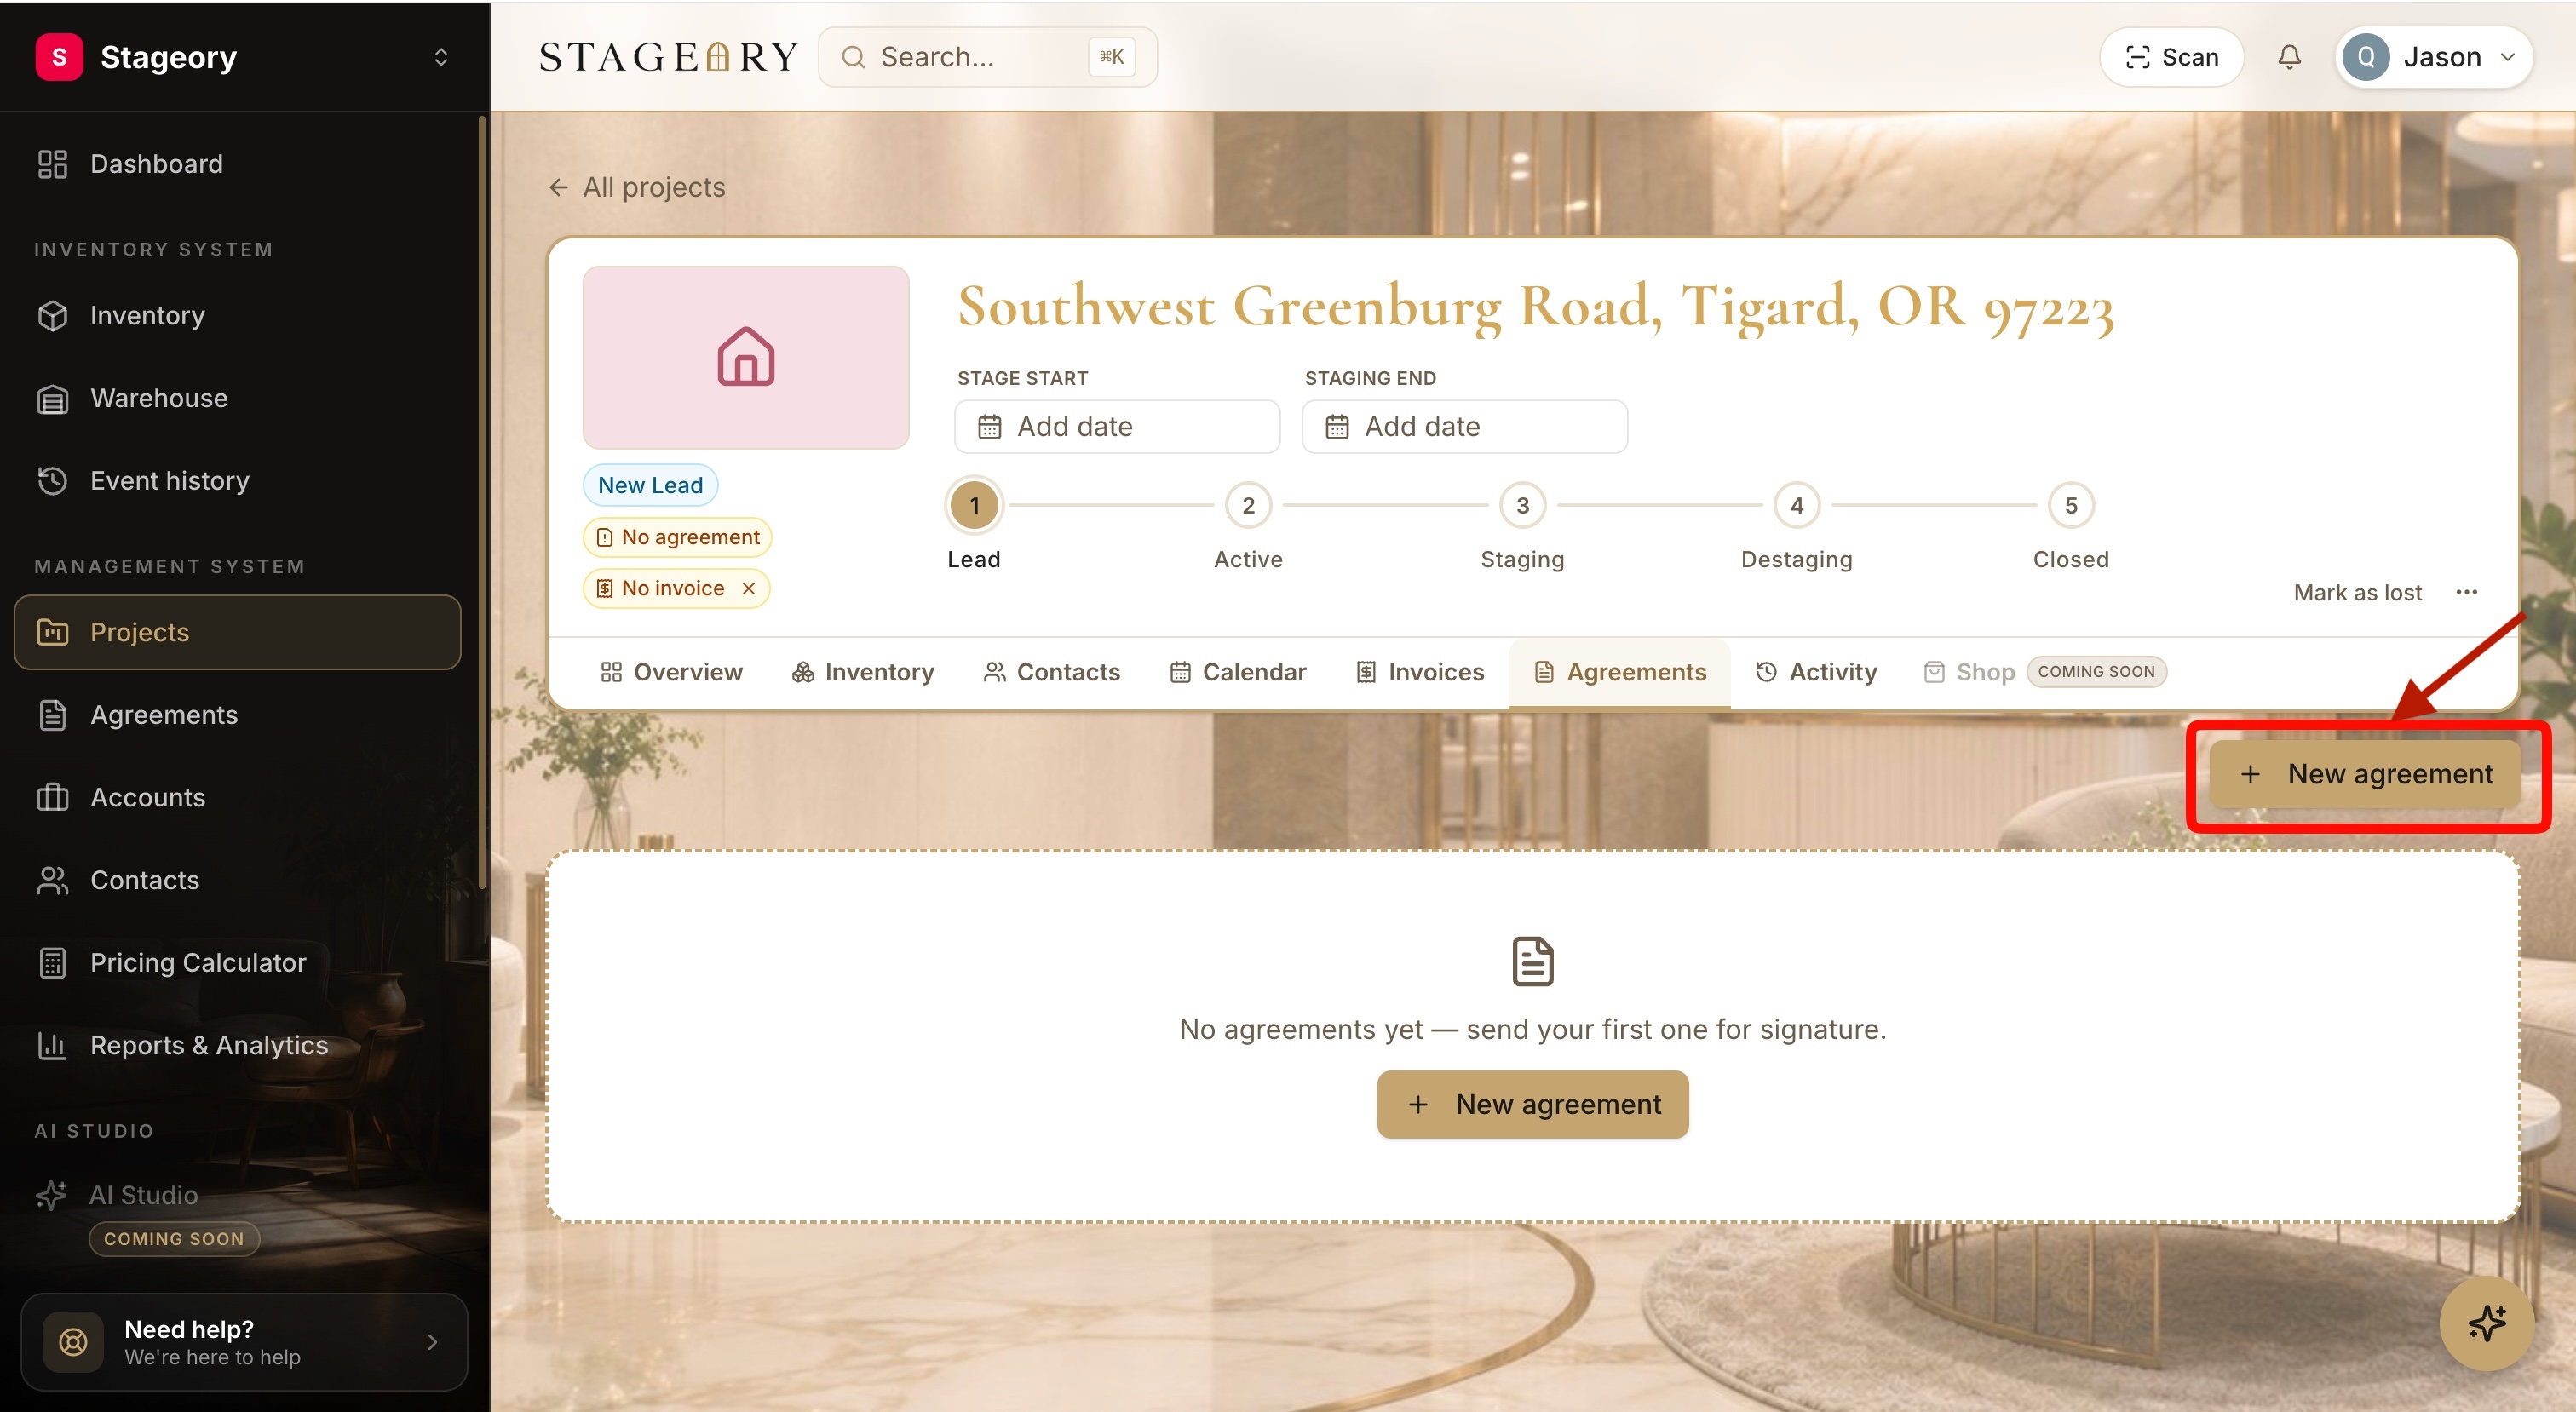
- 5
Add agreement signers
Step 1 — Signees.
- In Step 1, click Add Contact to pick the people who need to sign.
- Signers are usually homeowners, realtors, property managers, or other project stakeholders.
app.stageory.com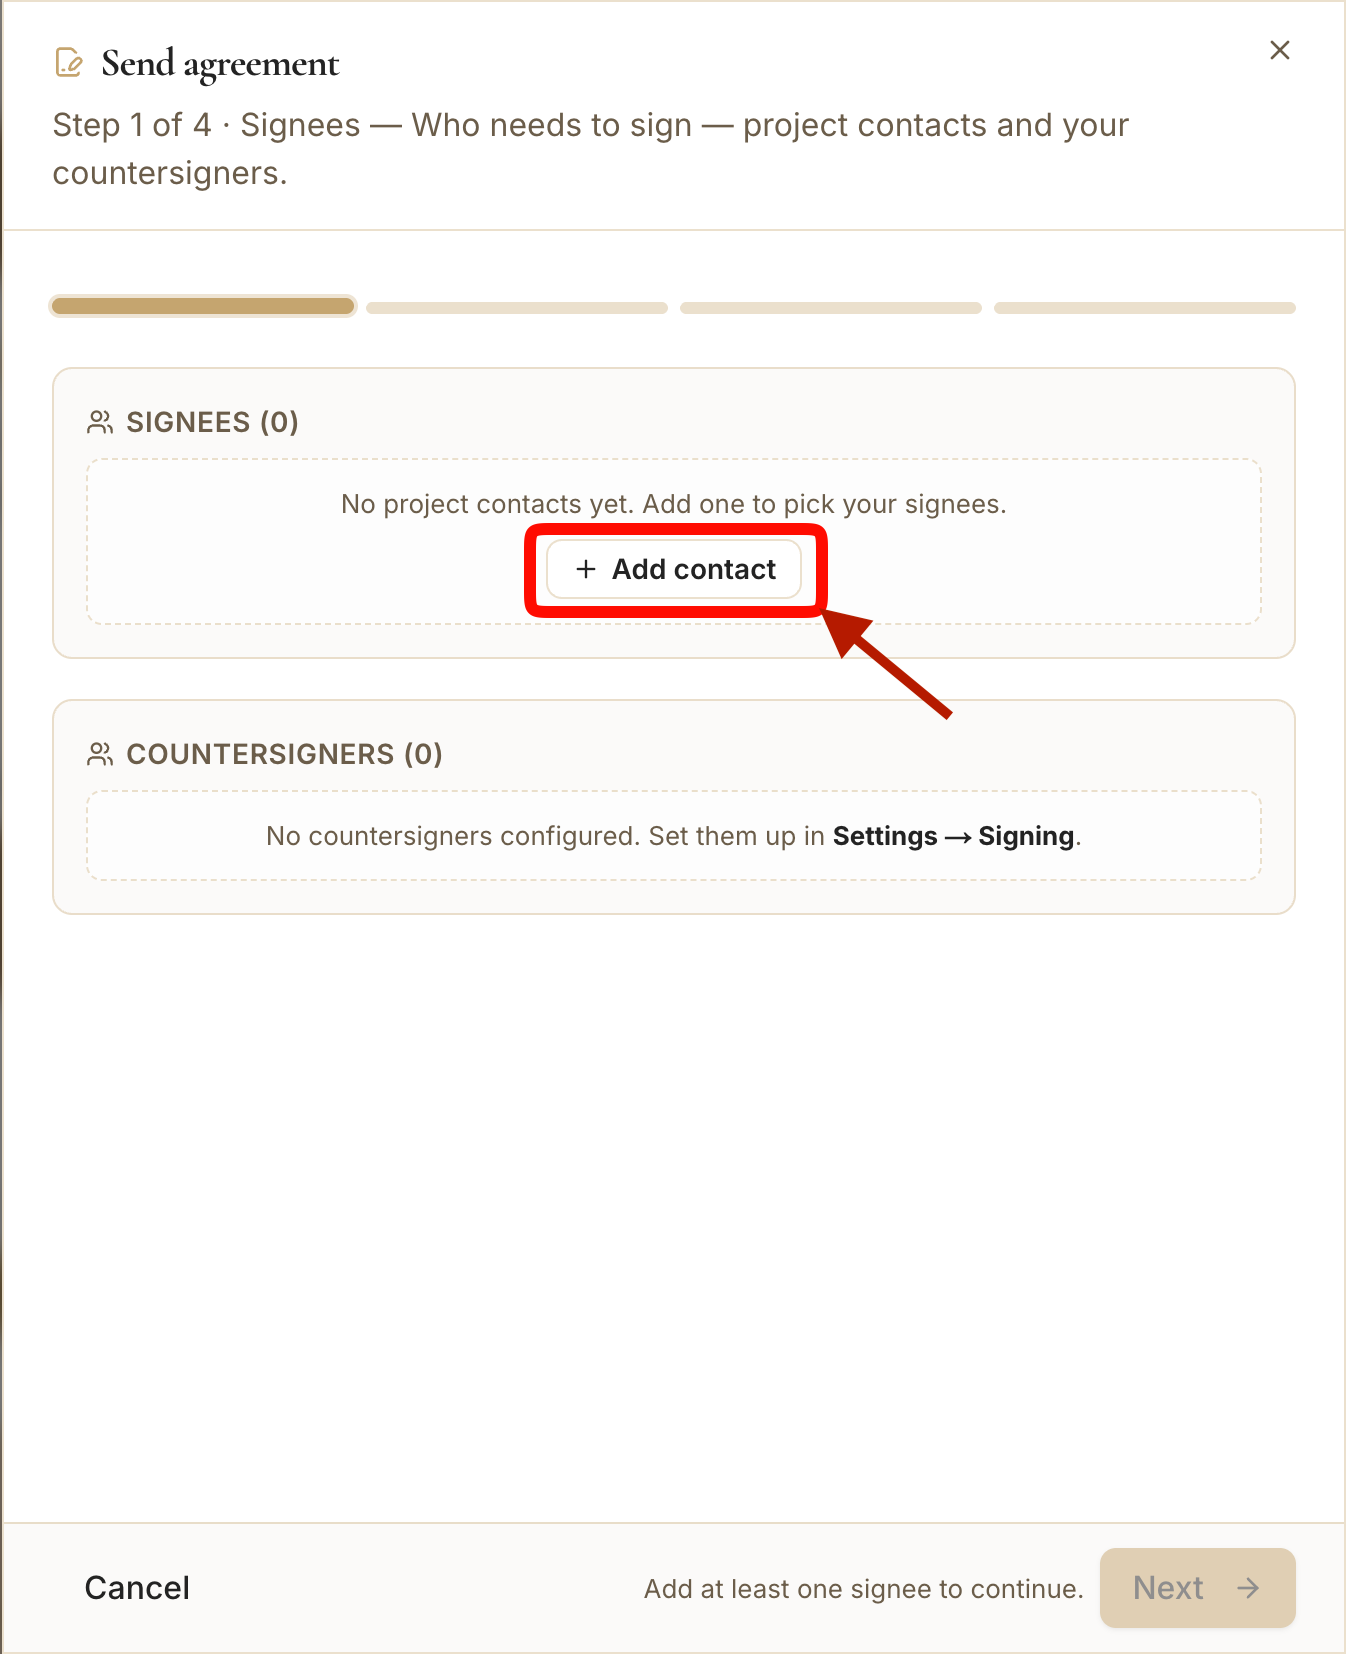
- 6
Assign contact roles
Role, primary, notes.
- Select an existing contact and assign the appropriate role.
- Optionally mark them as the primary contact, add project-specific notes, and define responsibilities.
app.stageory.com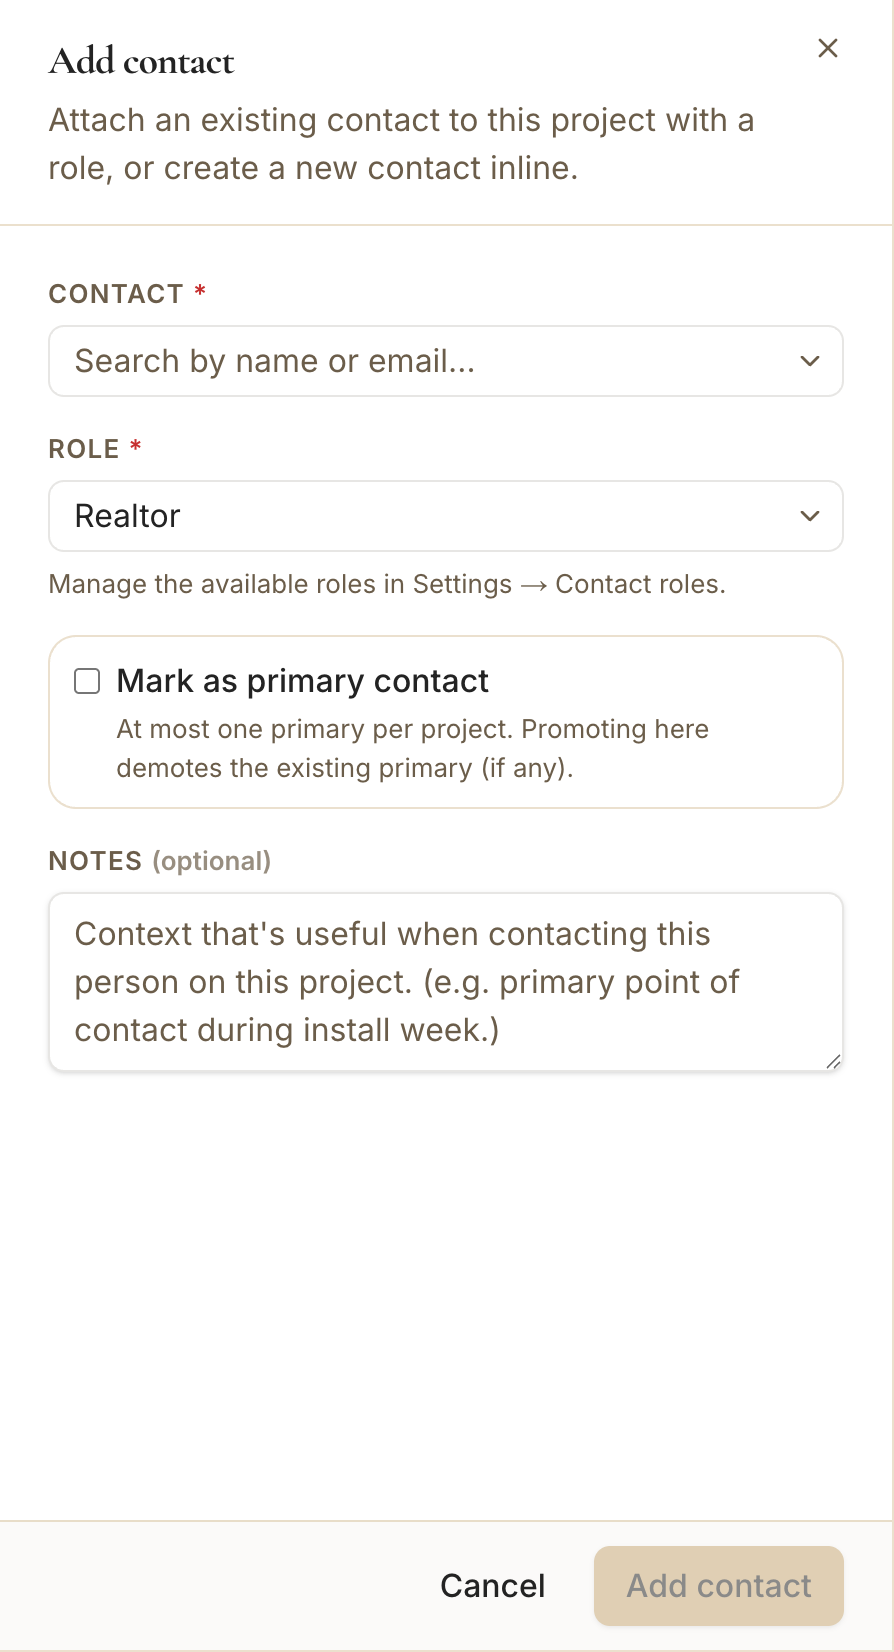
- 7
Select the signers
Choose who signs.
- Search for and choose the contacts who need to sign the document.
- Add multiple signers when required.
app.stageory.com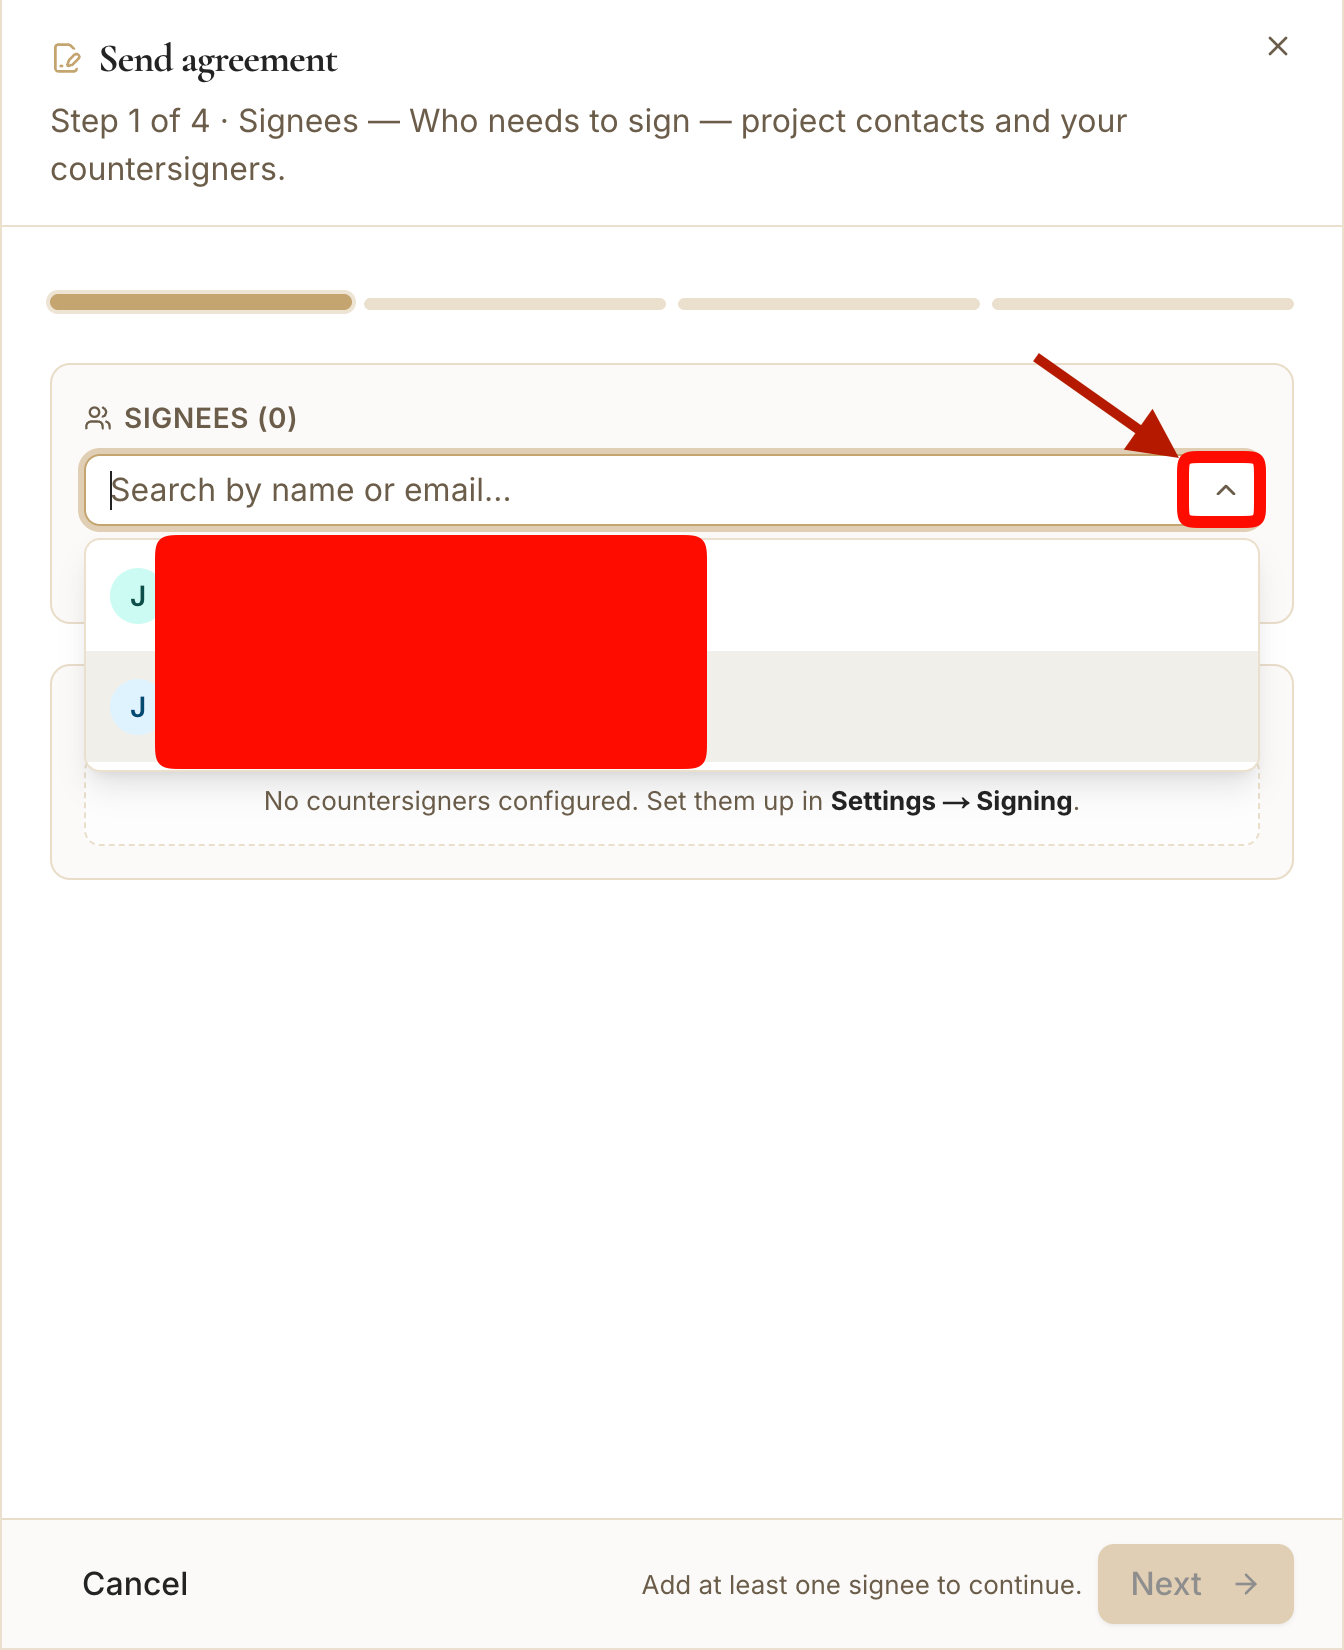
- 8
Confirm the signer list
Review, then continue.
- Review the selected signers.
- Once at least one signer is added, click Next.
app.stageory.com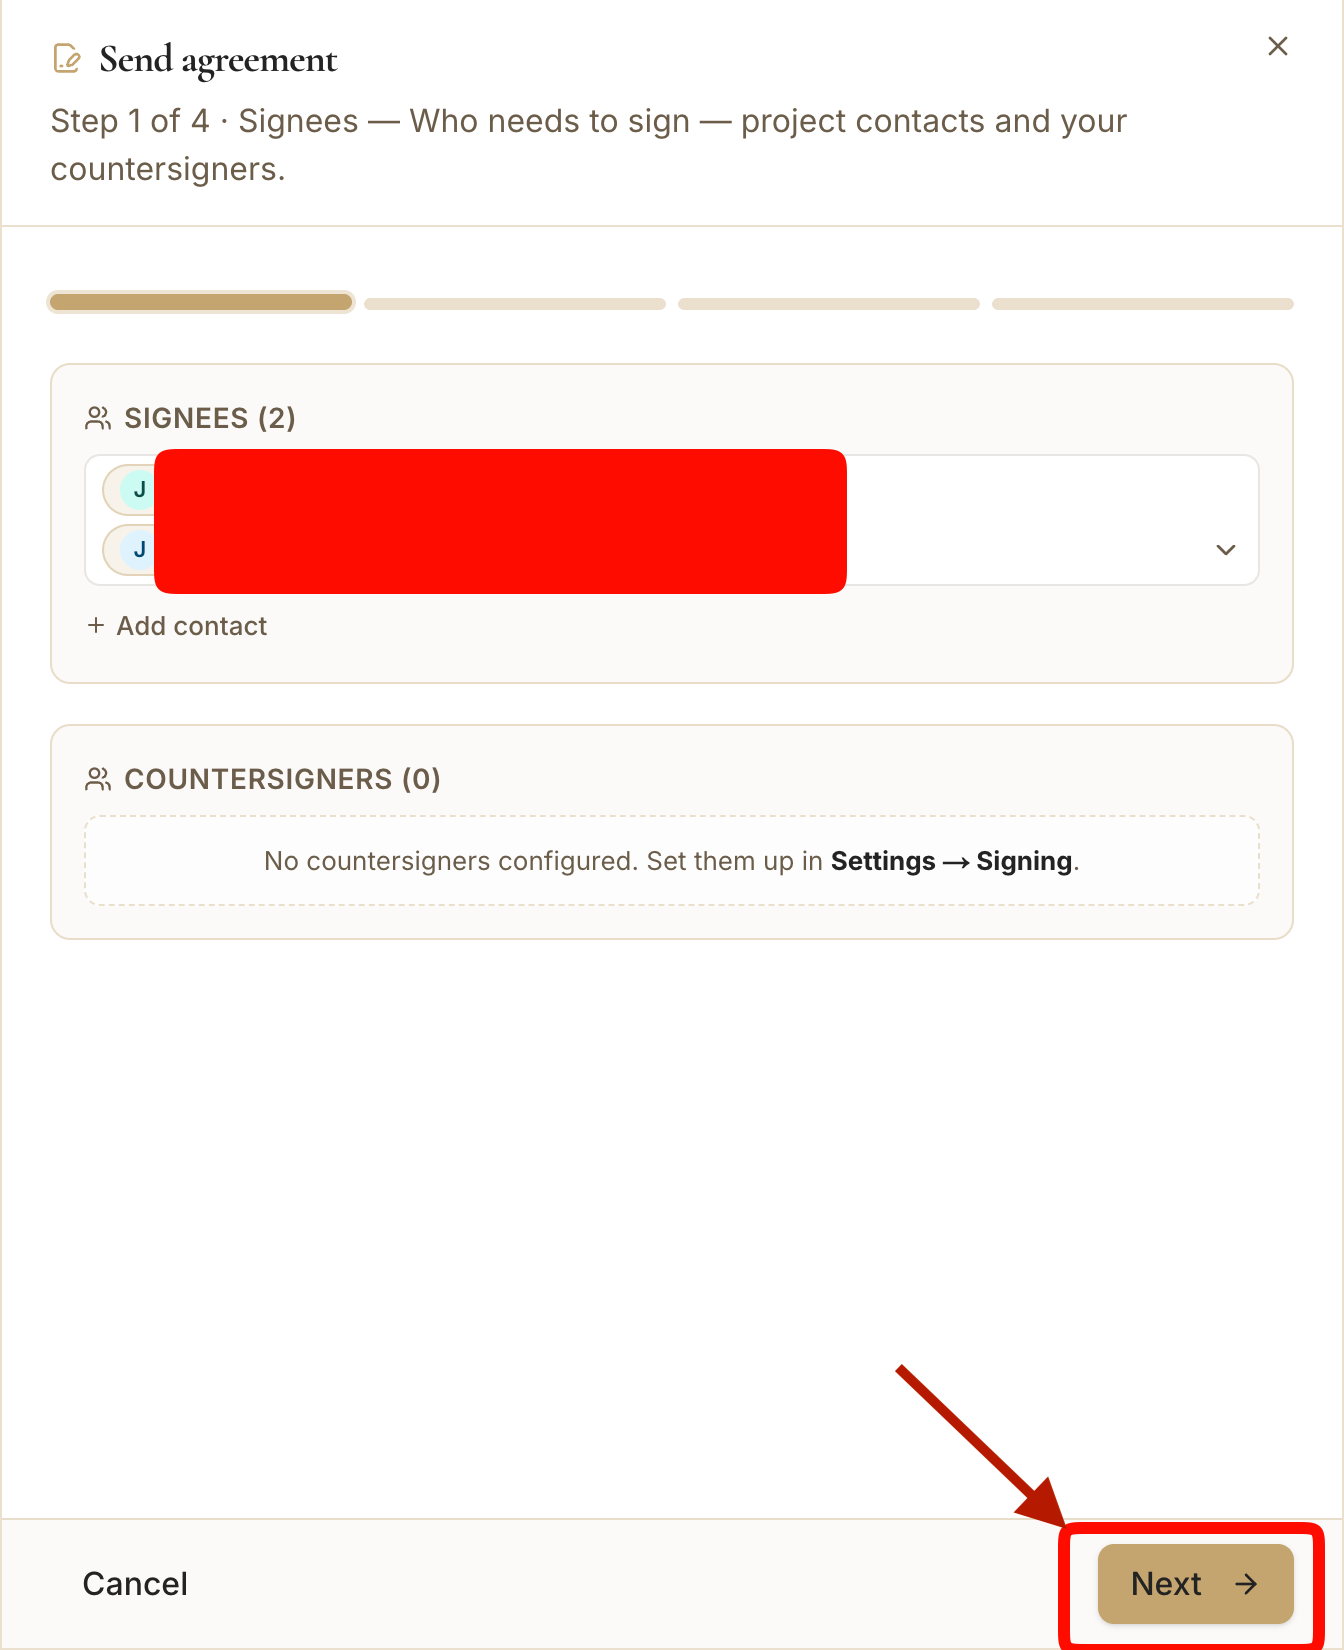
- 9
Upload agreement documents
Step 2 — Documents.
- In Step 2, click Add Files to upload the agreement.
- PDF only · up to 10 files · max 25 MB per file.
app.stageory.com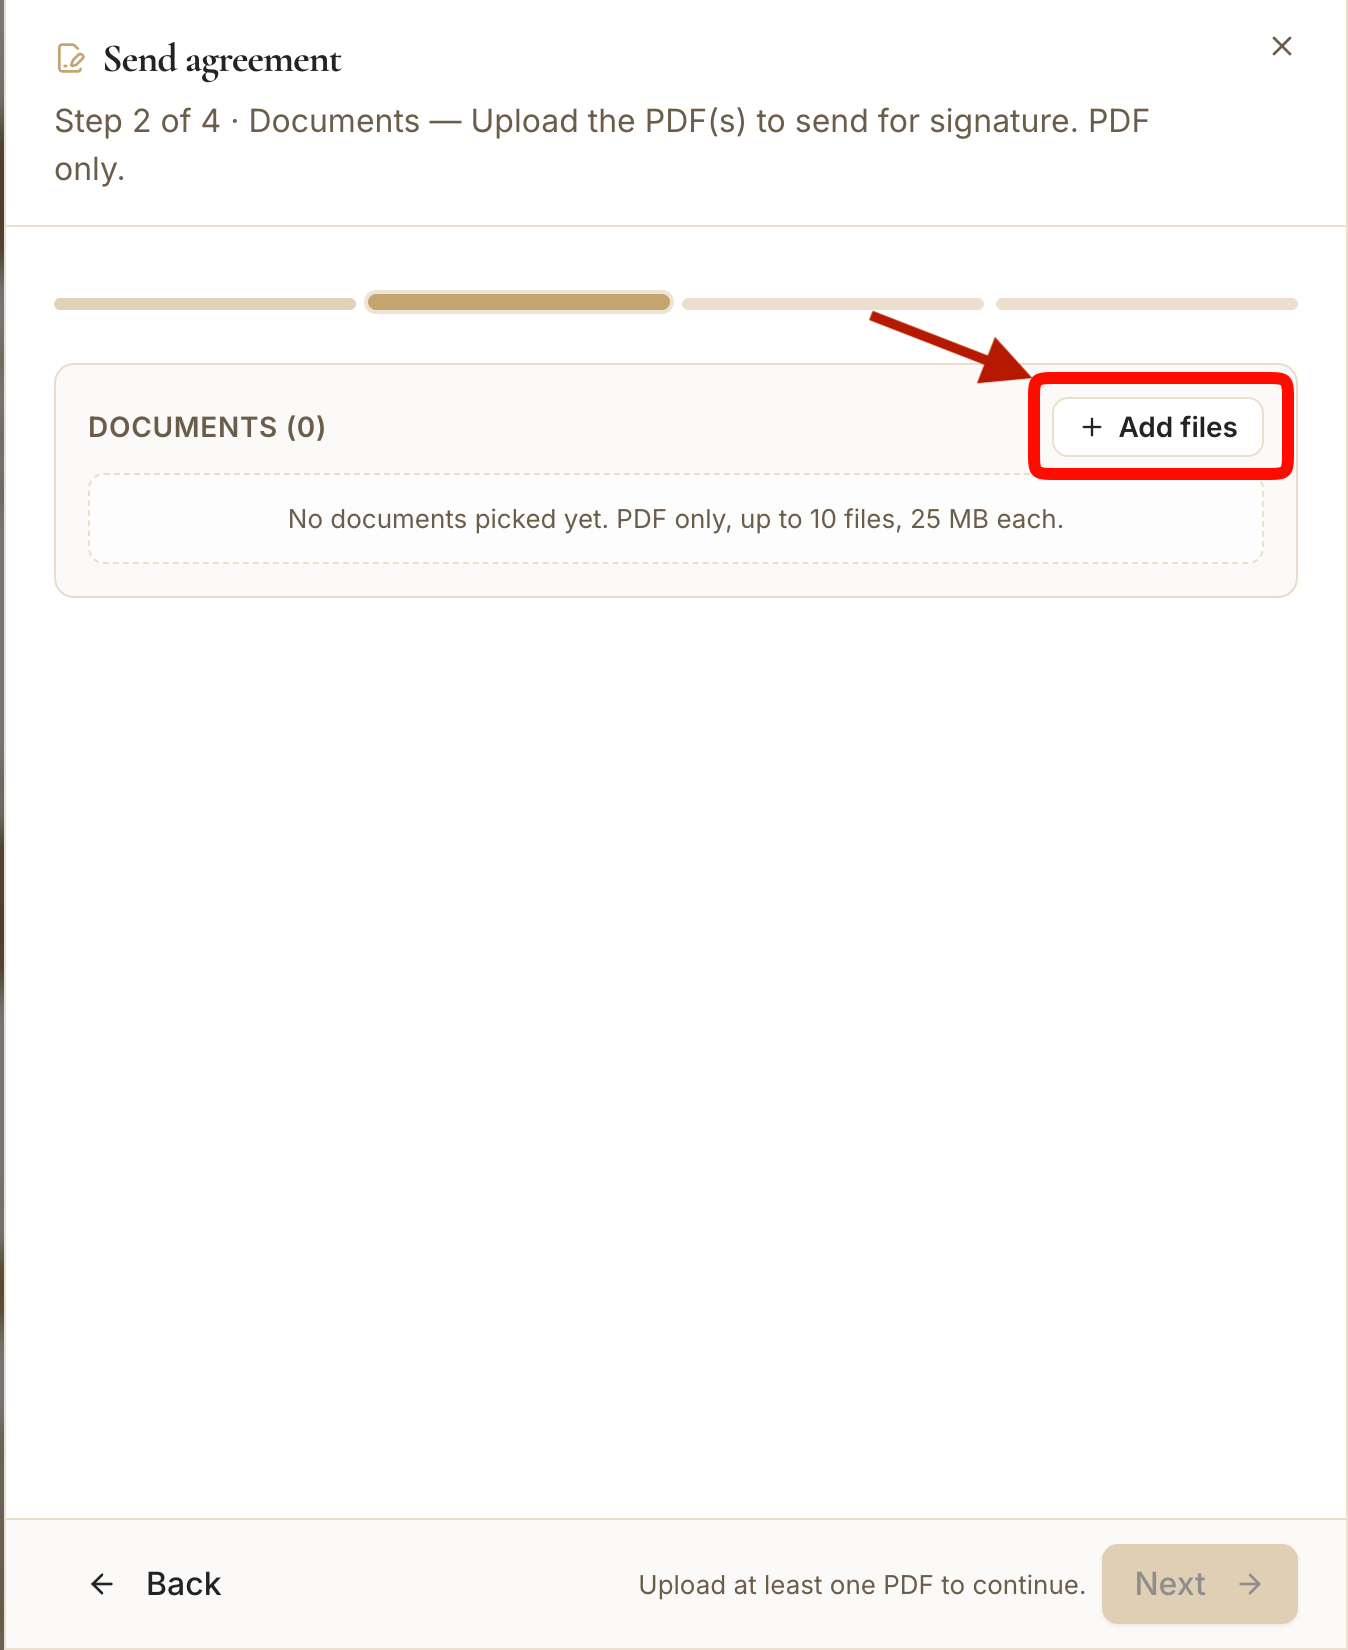
- 10
Review uploaded documents
Check the files.
- Verify the correct files uploaded; add or remove PDFs as needed.
- Click Next when ready.
app.stageory.com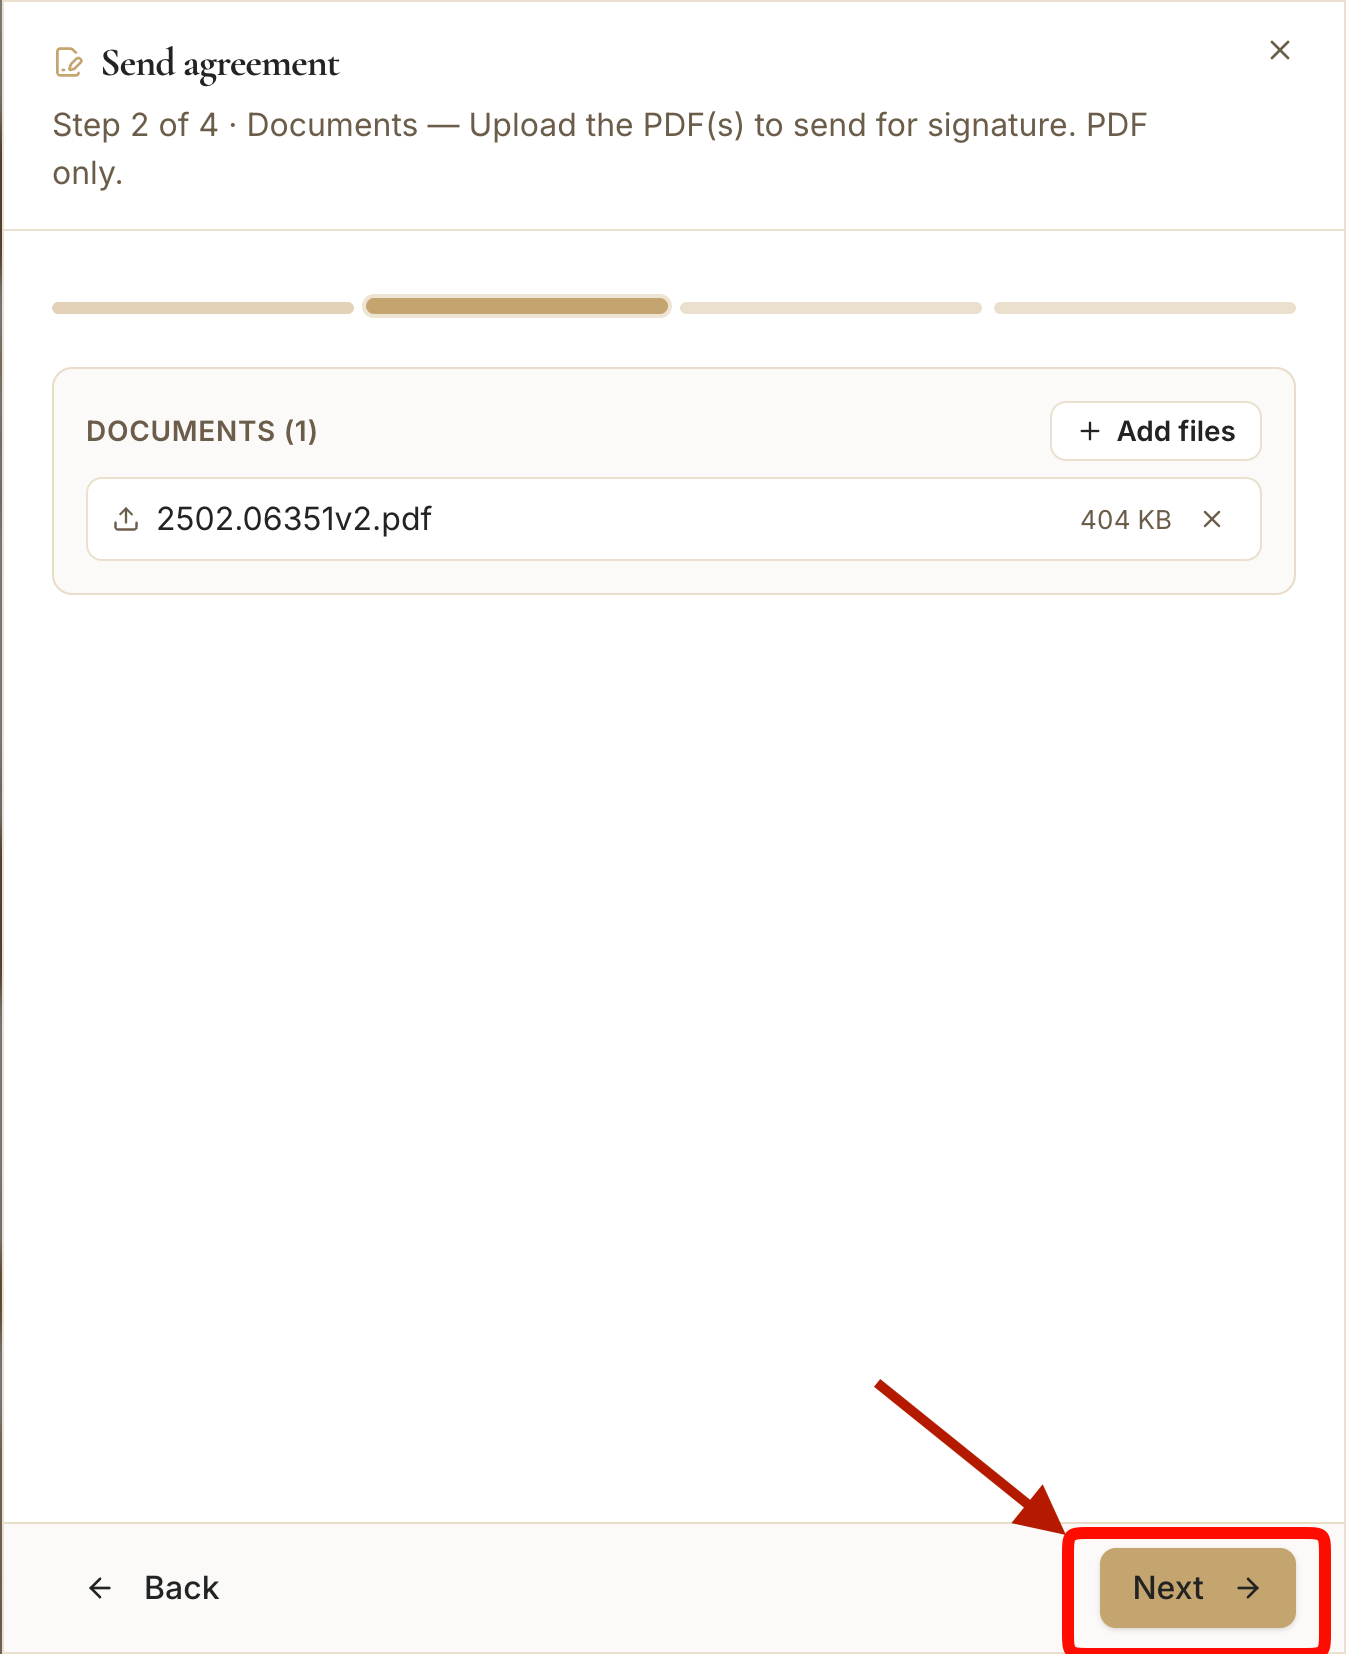
- 11
Configure signature placement
Step 3 — Place fields.
- In Step 3, click Open Placement Editor.
- Define where signatures and dates should appear in the document.
app.stageory.com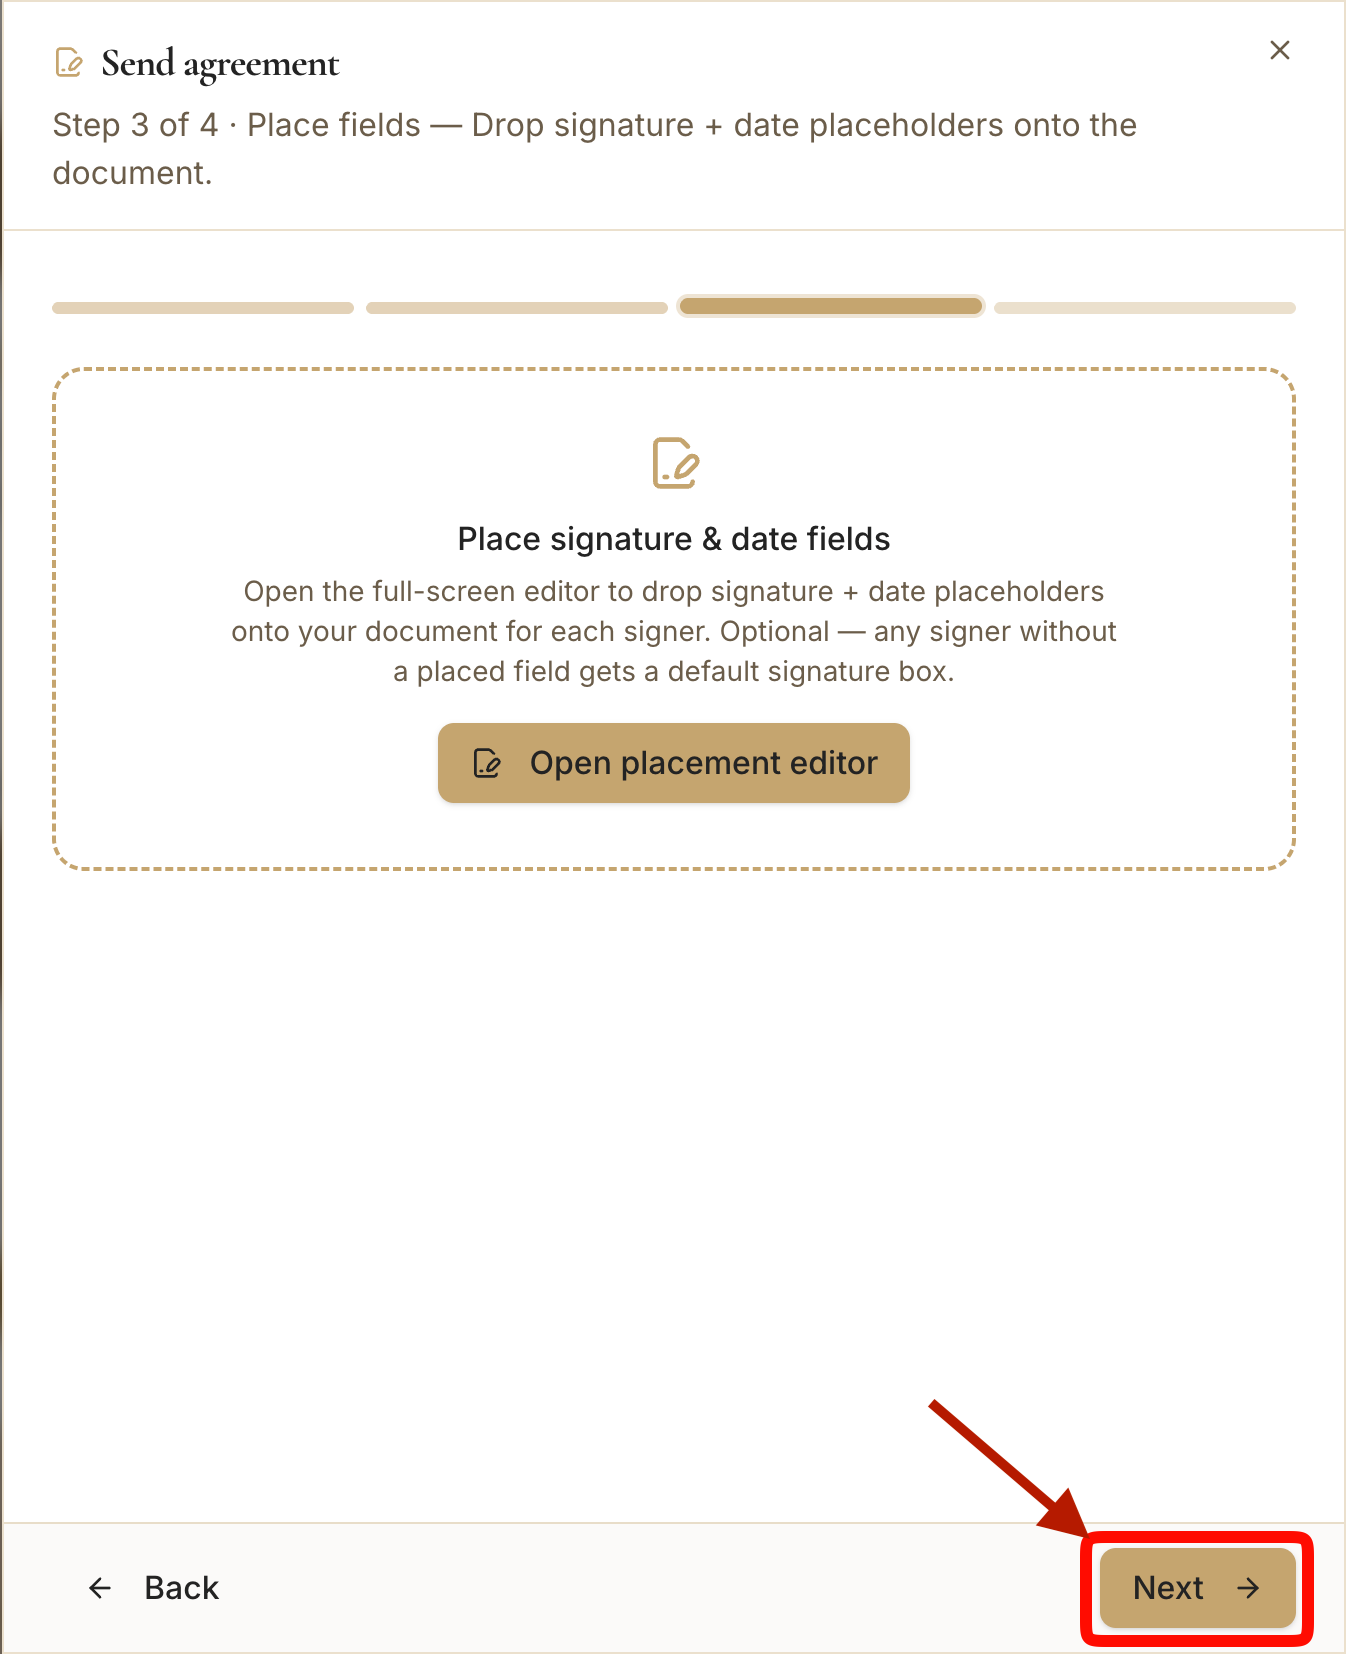
- 12
Review agreement details
Step 4 — Title, type, pricing, message.
- Enter a clear Agreement Title (e.g. Home Staging Agreement).
- Pick the Agreement Type: Proposal, Contract, Change Order, Estimate, or Other.
- Optionally add Total Price / Amount Due Now, and a Signer Message recipients see before signing.
app.stageory.com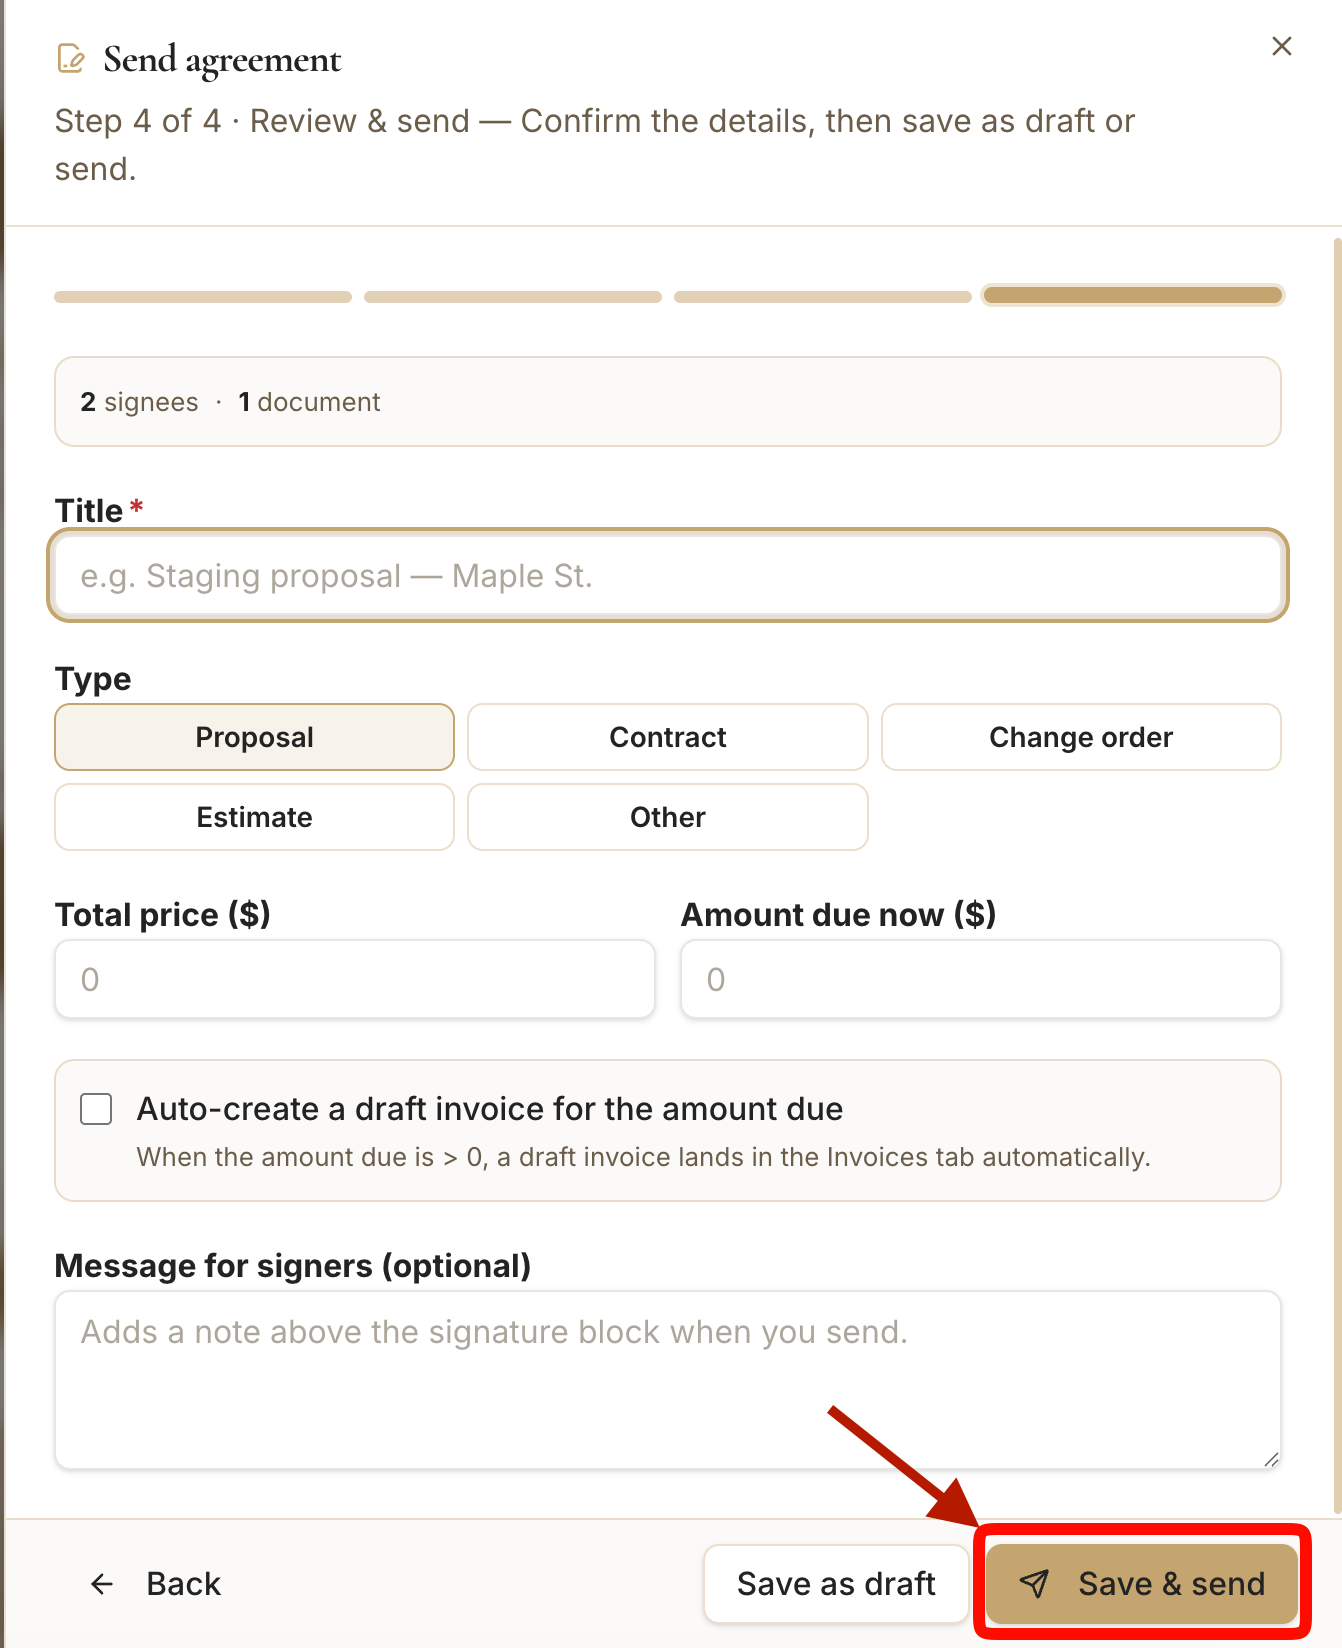
- 13
Send the agreement for signature
Deliver and track.
- After reviewing everything, click Save & Send.
- Stageory delivers it to all signers, tracks signature progress, records activity, and stores the completed agreement in the project.
app.stageory.com
Tips
- Signing runs through BoldSign — signers get an emailed link and the status updates here automatically.
- A signer must have an email on file — add one on the contact first if someone's missing from the list.
- Use a clear, specific Agreement Title — it's what the client sees in their inbox.
Still need help?
Can't find what you're looking for? Our team is here.