
Create a project
Create a project for each property — it becomes the hub for that job's inventory, agreements, schedule, and room assignments.
Open in Stageory- 1
Open the Projects page
Where every staging project lives.
- Navigate to Management System → Projects in the left sidebar.
- This is where you create and manage all staging projects, properties, schedules, and room assignments.
app.stageory.com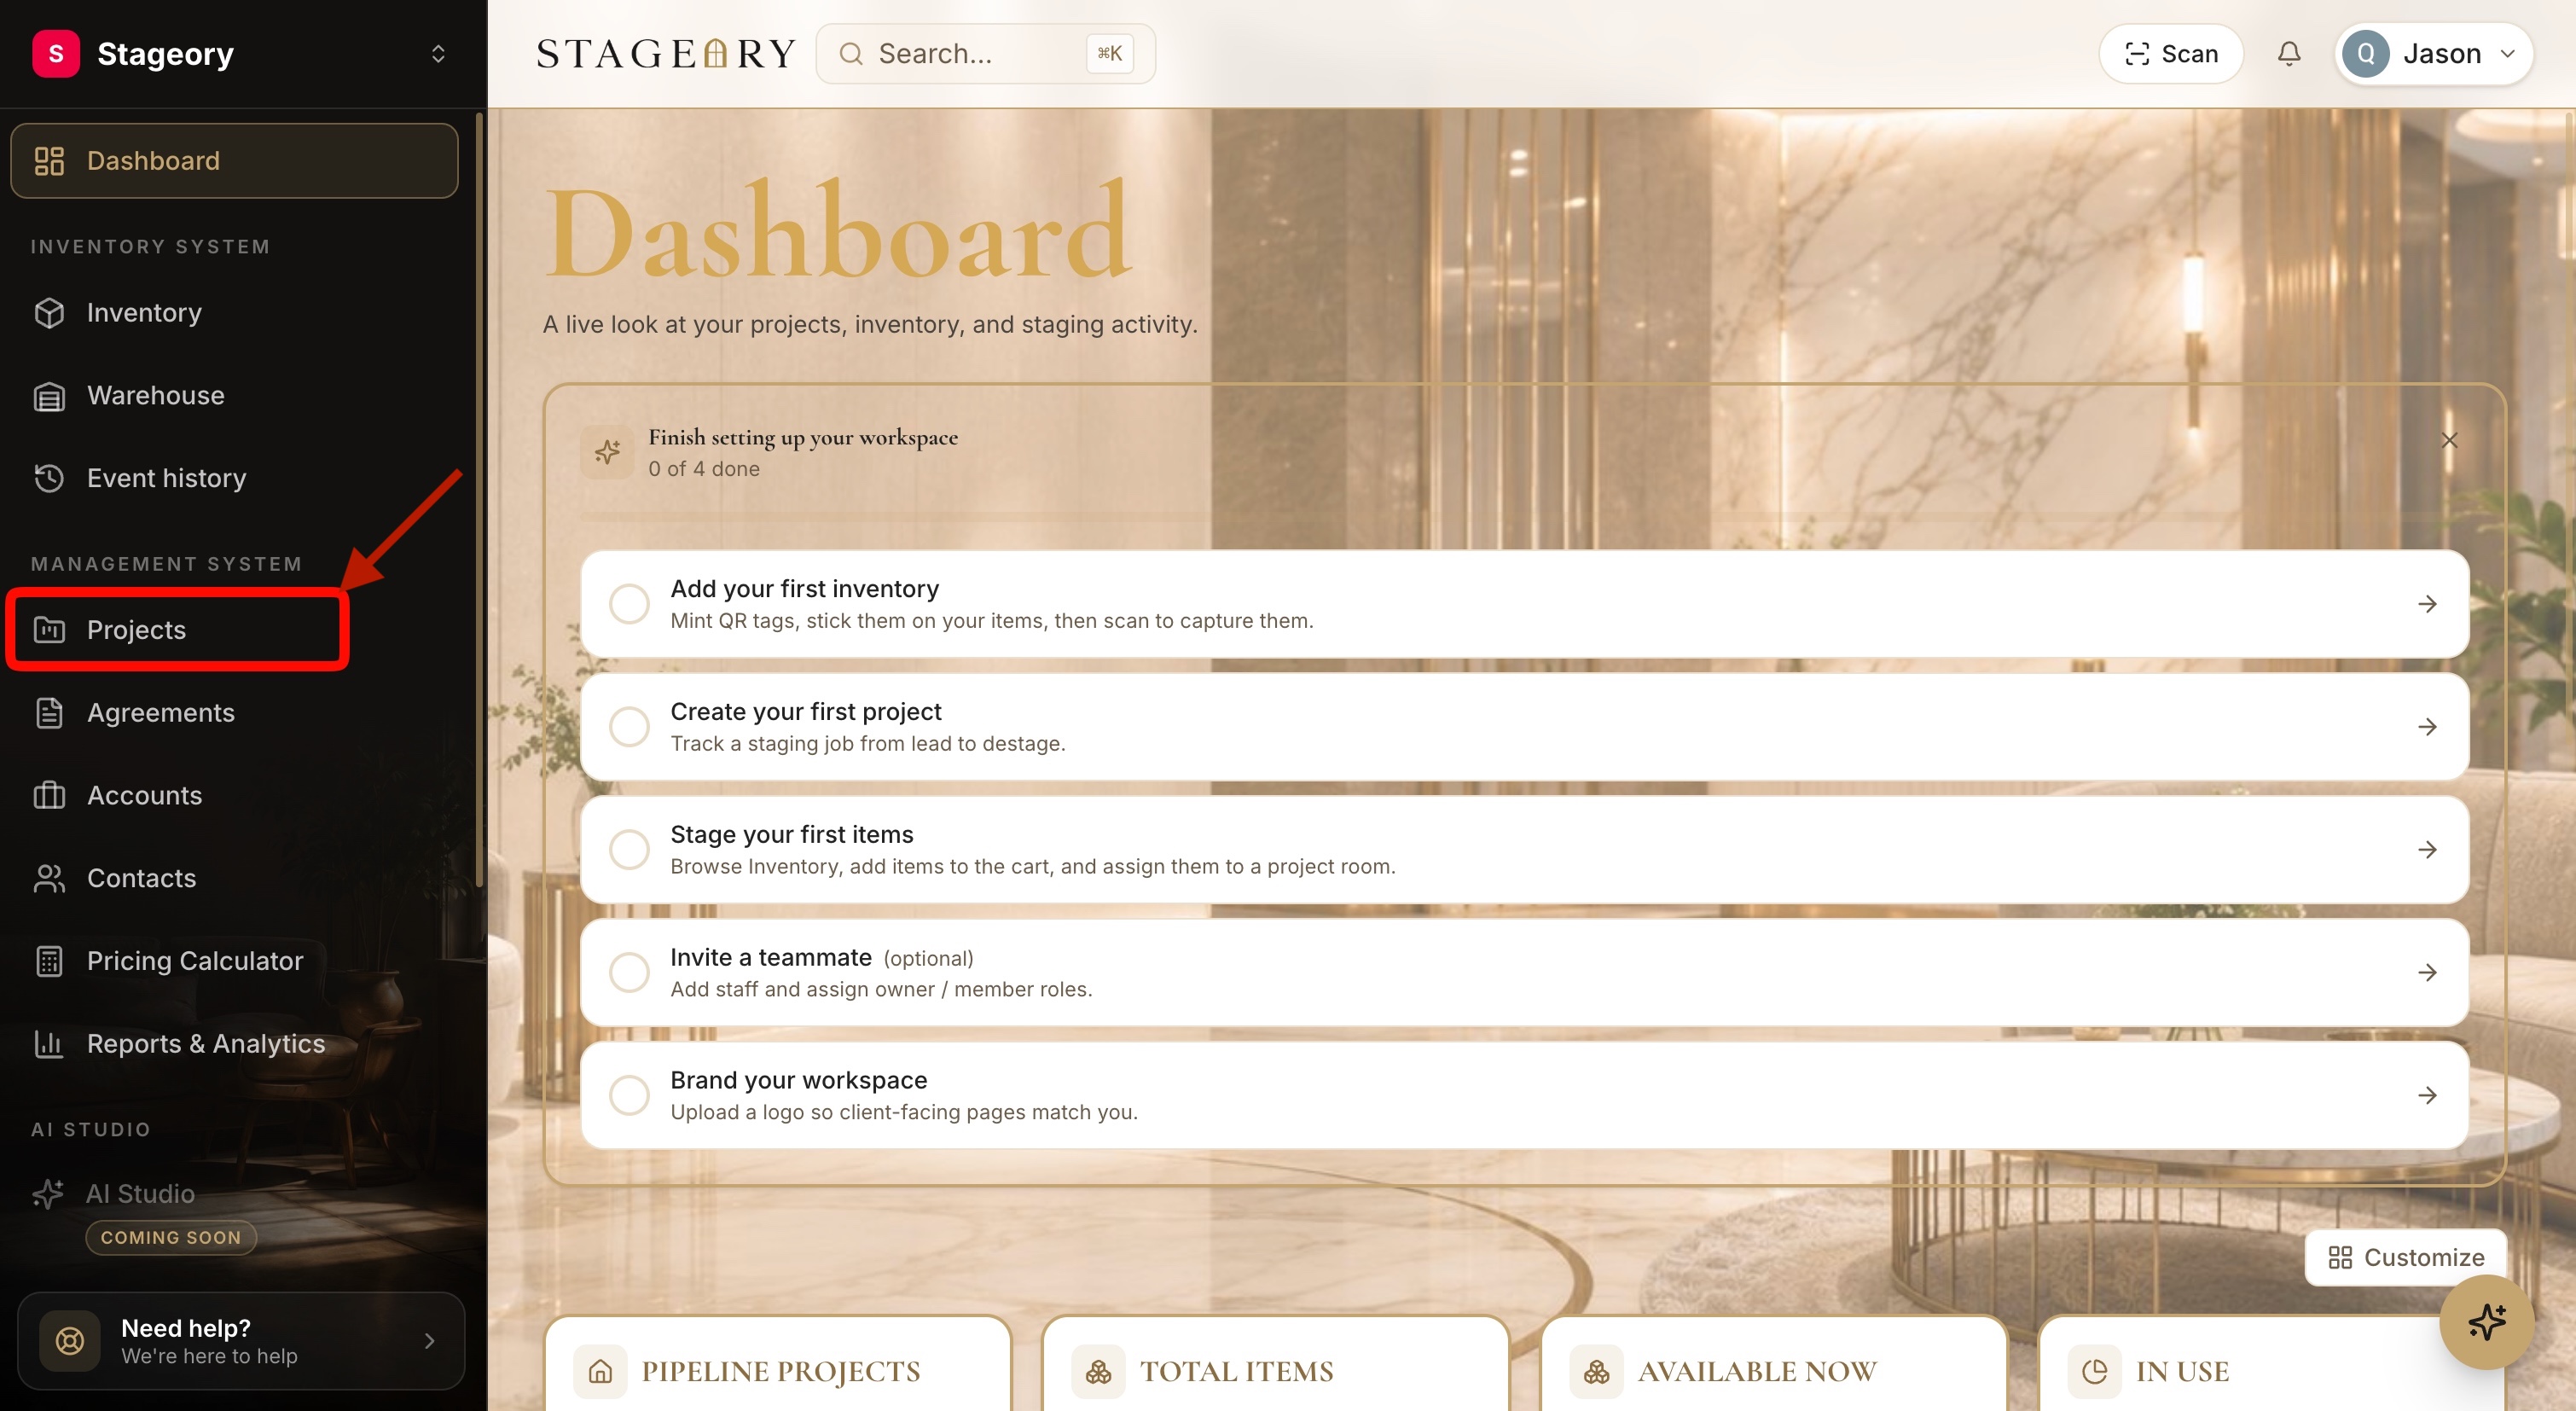
- 2
Click the New Project button
Start a new staging project.
- In the top-right corner of the Projects page, click New Project.
app.stageory.com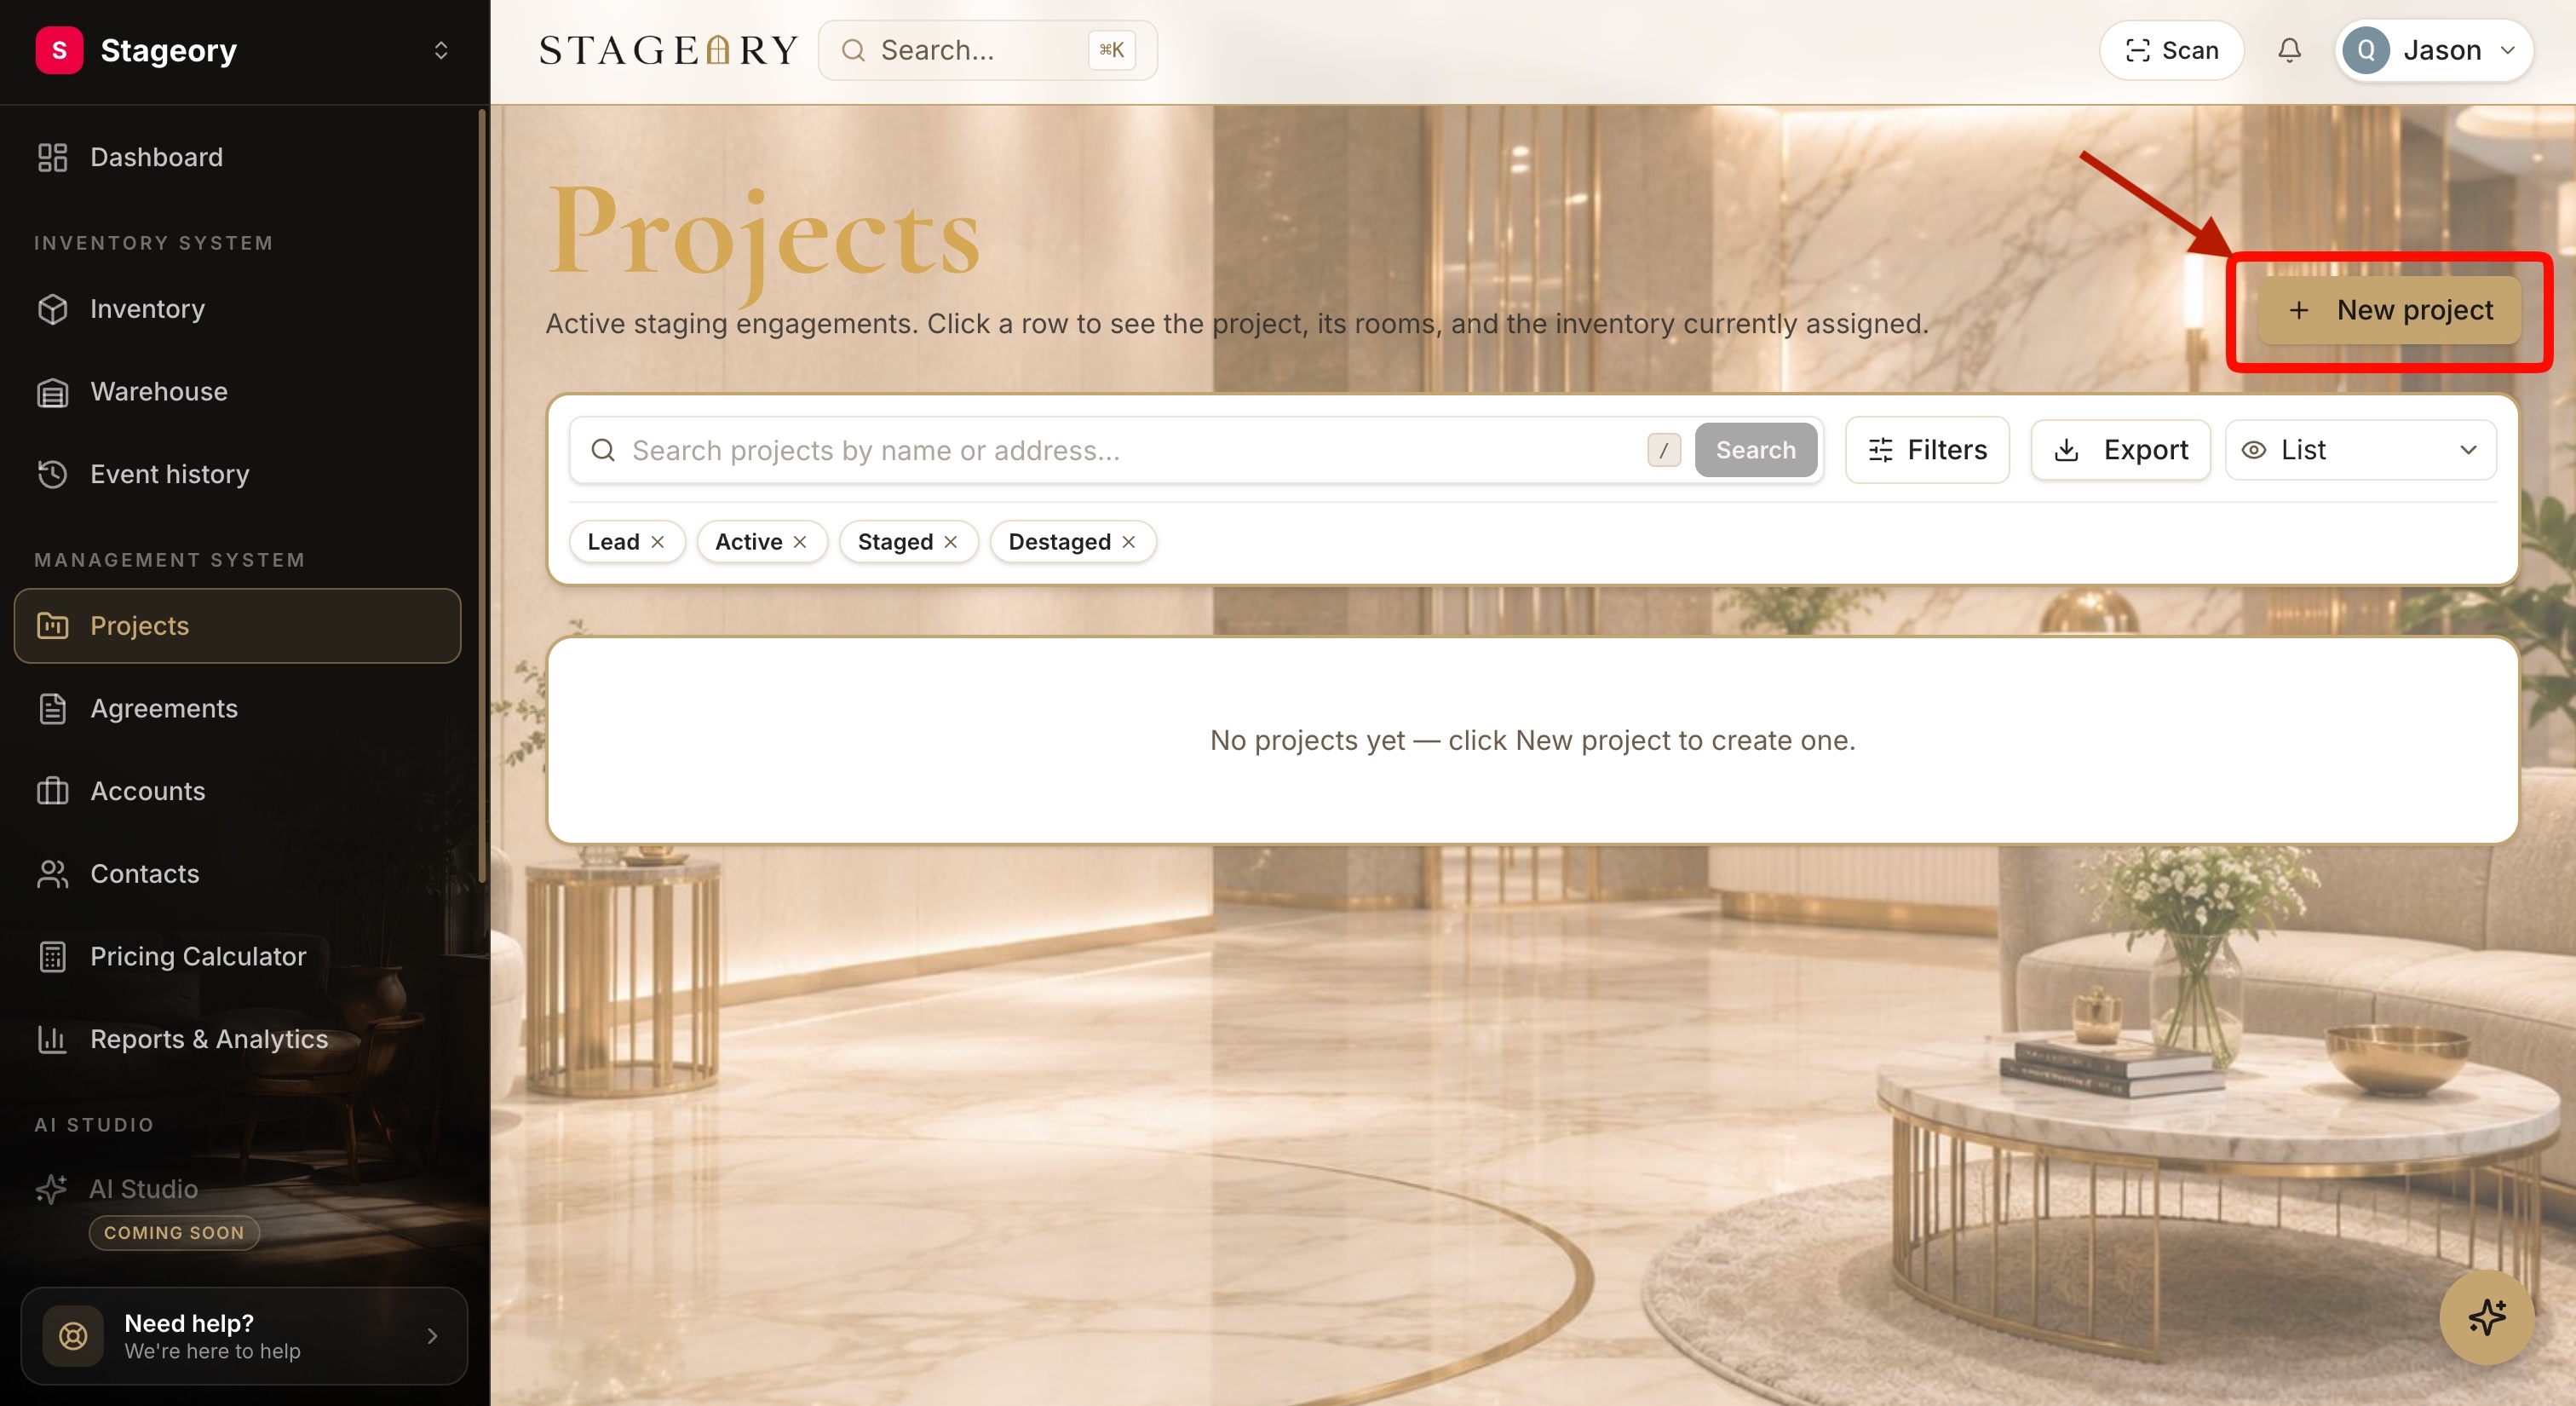
- 3
Enter the property address
Search via Google Places.
- Use the Property Address field to search for the project location through Google Places.
- Once a location is selected, Stageory auto-fills the structured fields: Street Address, City, State / Region, Postal Code, and Country.
app.stageory.com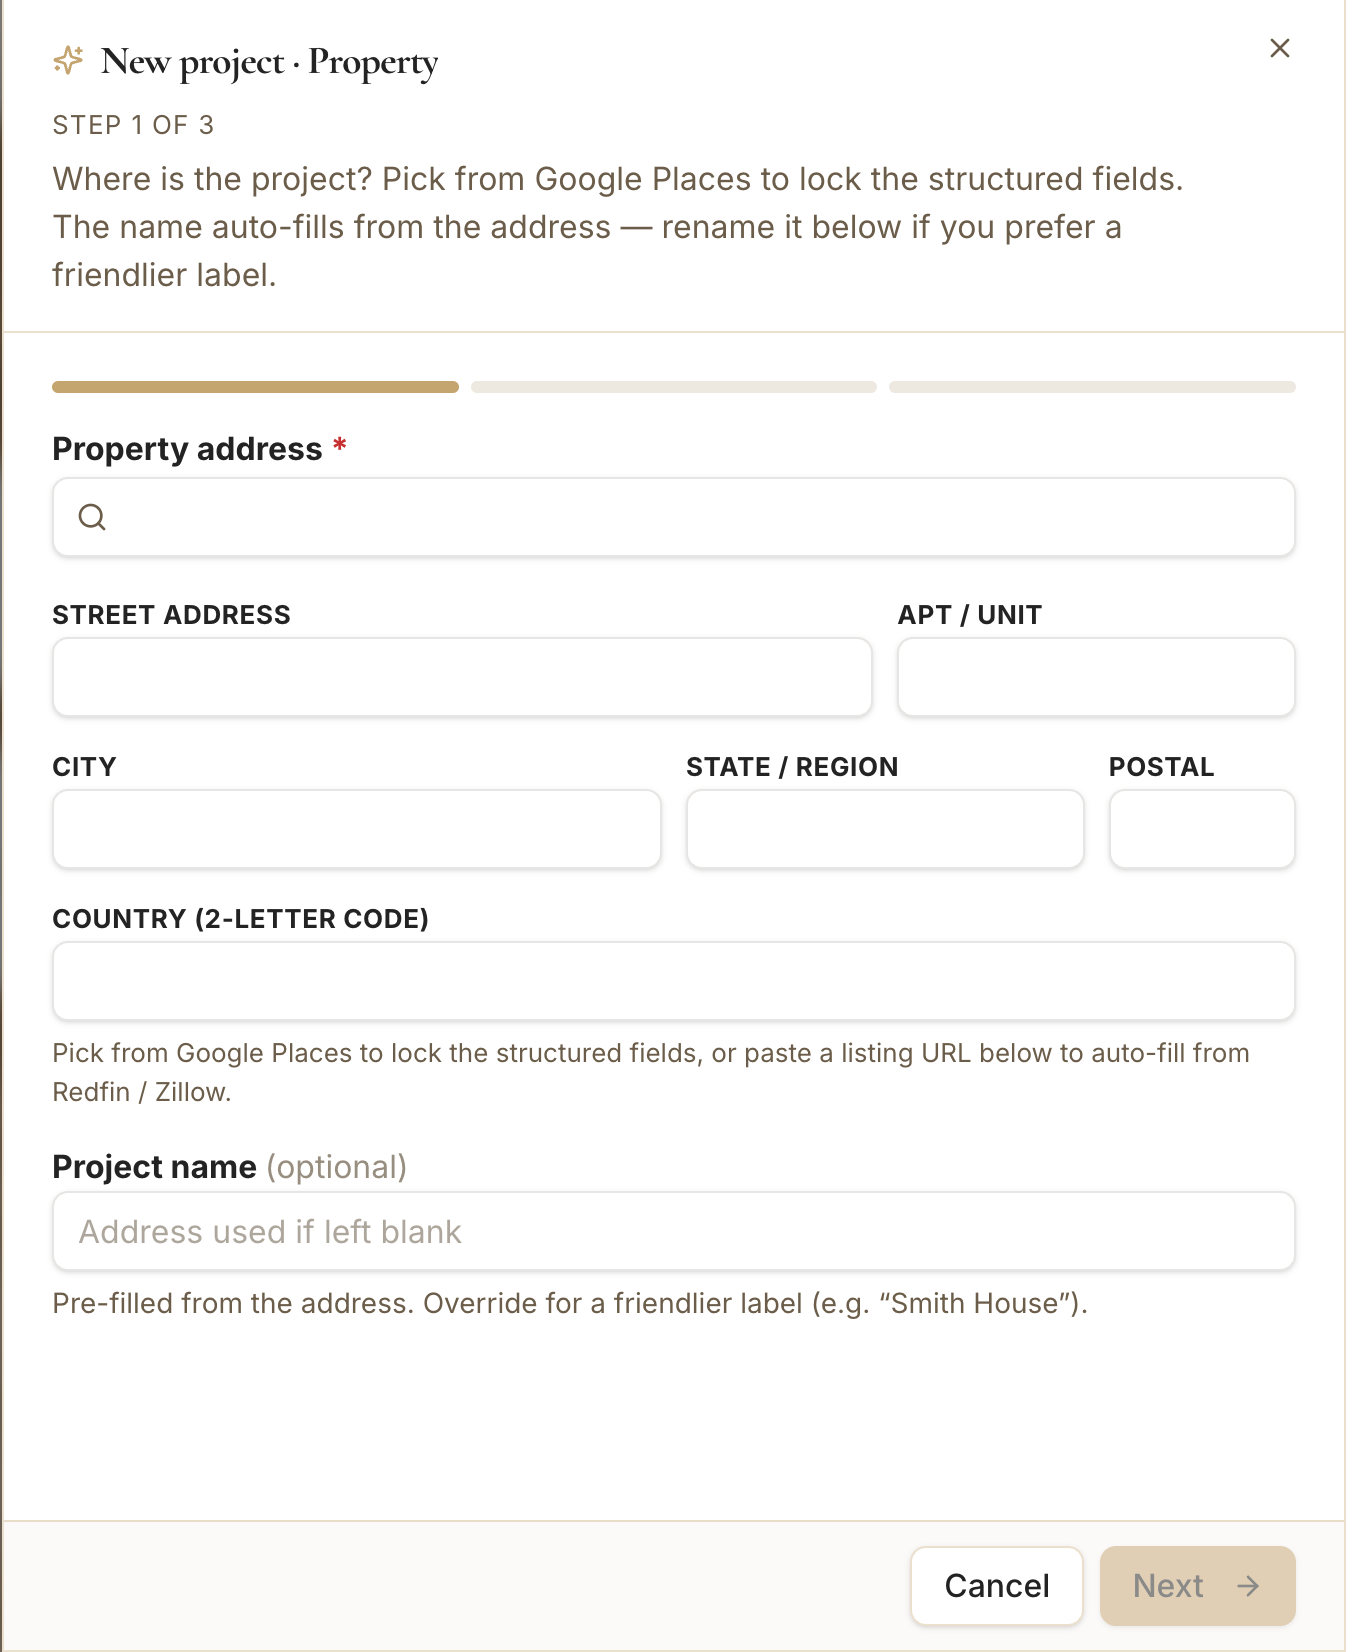
- 4
Verify the address and click Next
Confirm, then continue.
- Review the automatically populated address fields.
- Optionally enter a custom Project Name if you prefer something more recognizable than the address.
- When everything looks correct, click Next.
app.stageory.com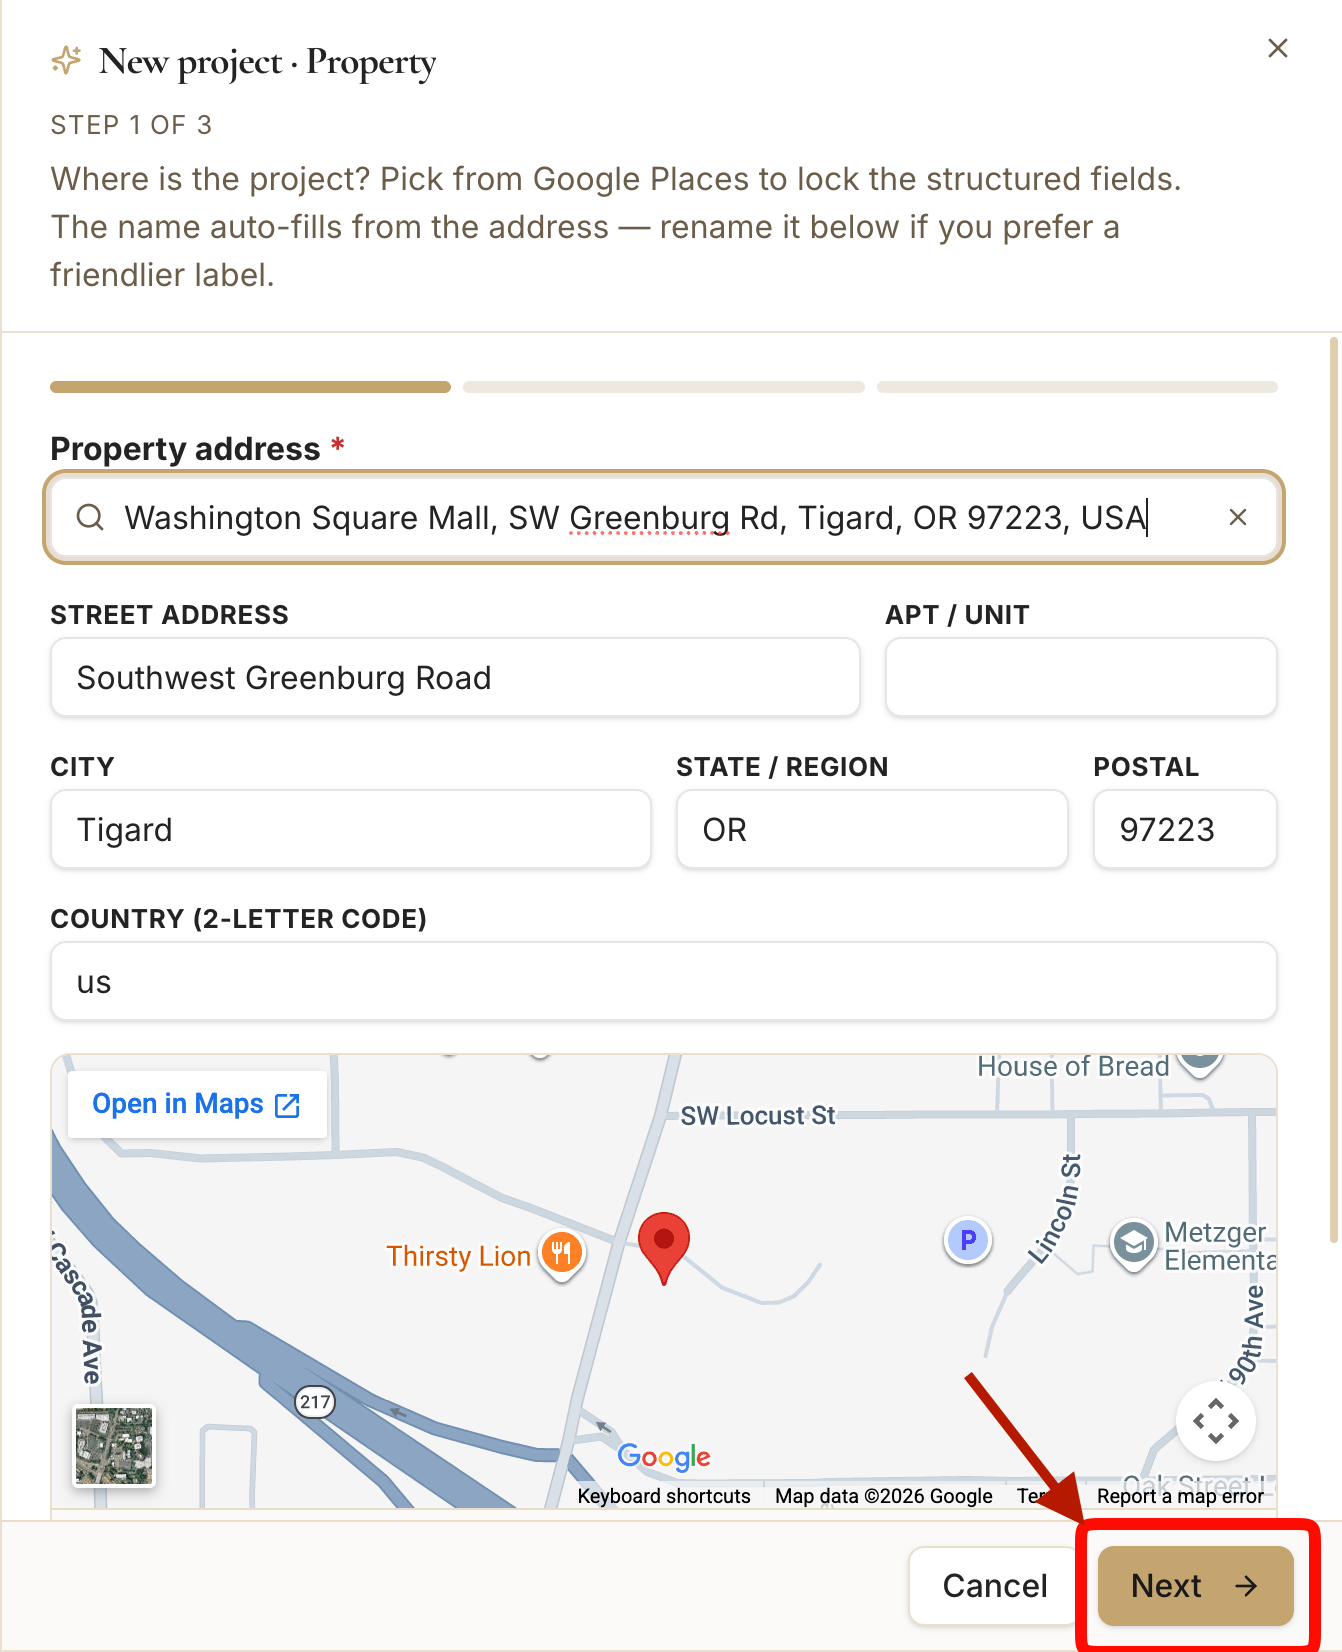
- 5
Configure the project schedule
Set the staging timeline.
- Set the Staging Start Date (install day) and the Staging End Date (last day on site).
- The Loading Date is auto-calculated from your workspace defaults but can be adjusted if needed.
app.stageory.com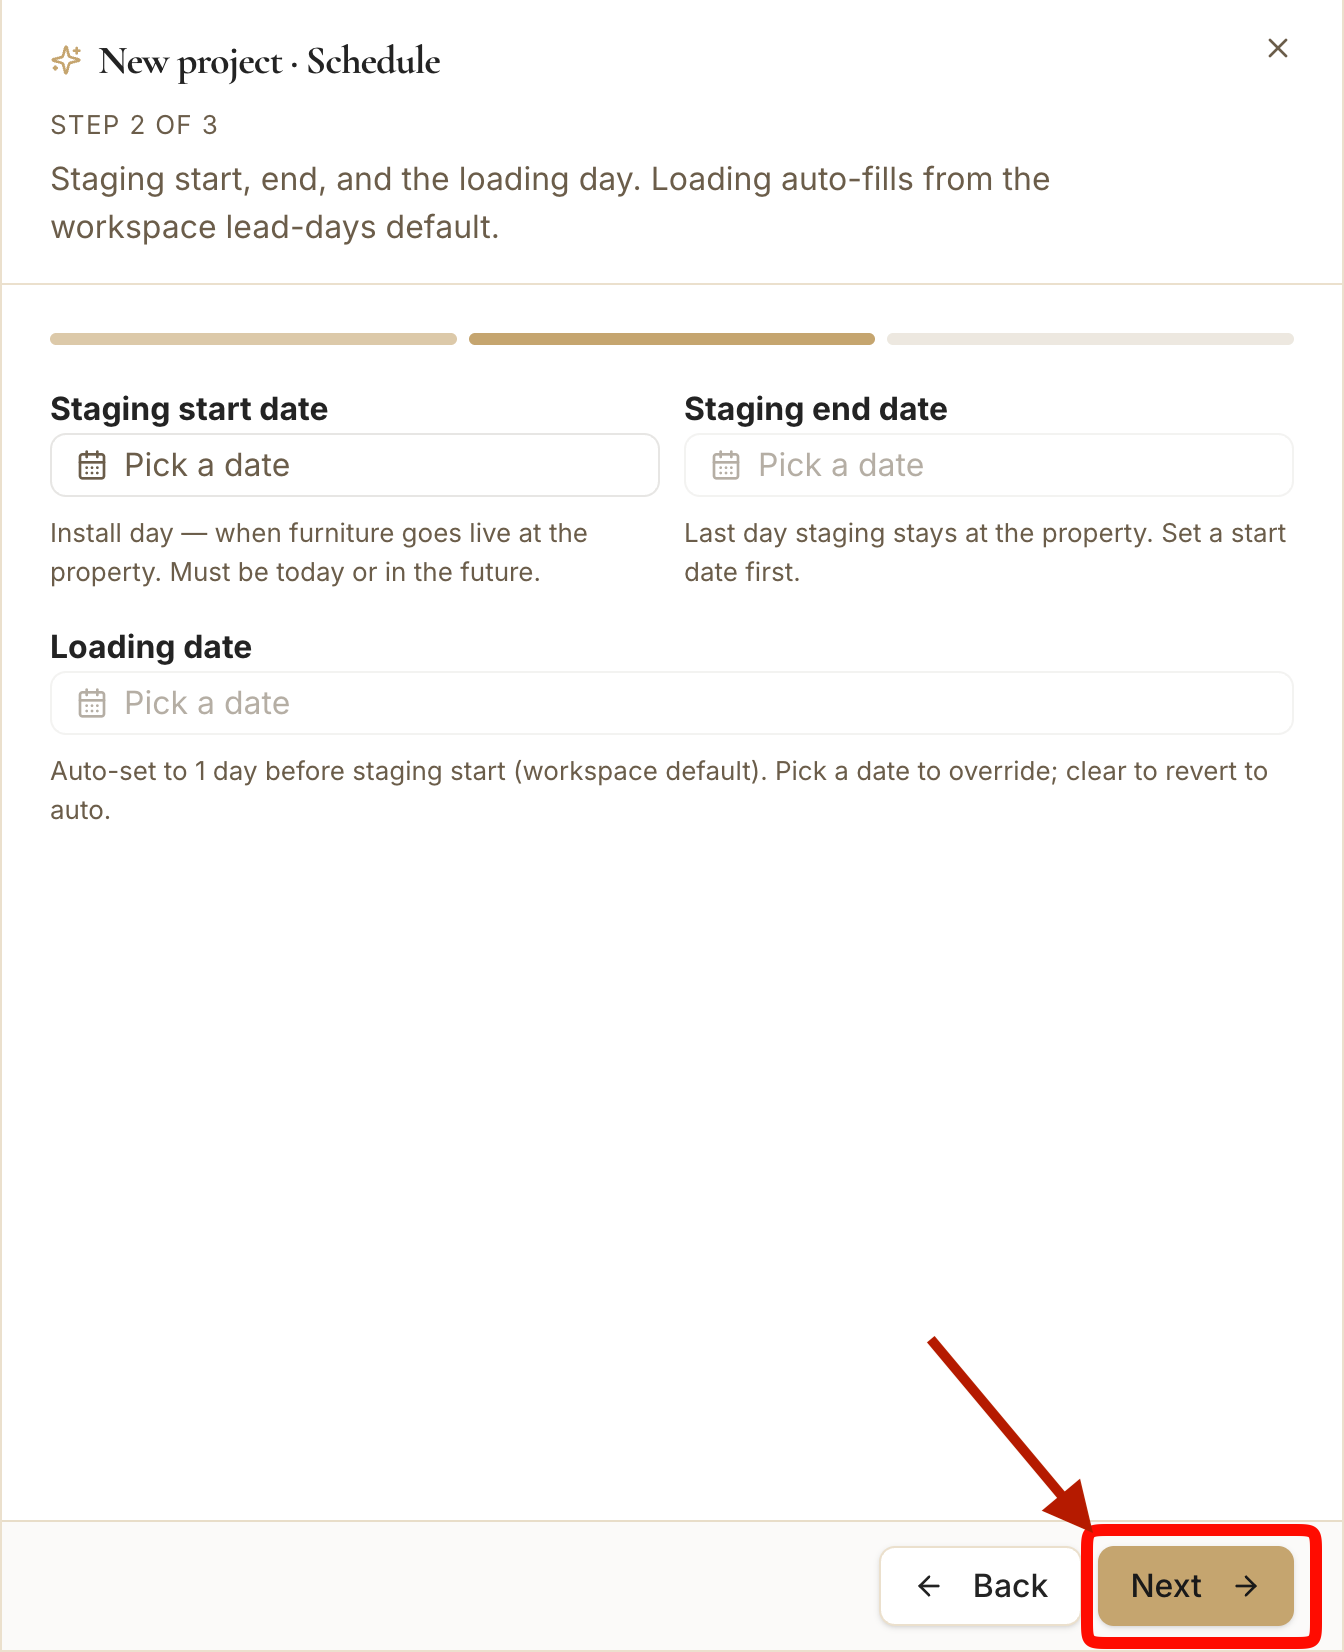
- 6
Review the schedule and continue
Confirm the dates.
- Confirm the selected dates.
- Click Next to continue to the final project details step.
app.stageory.com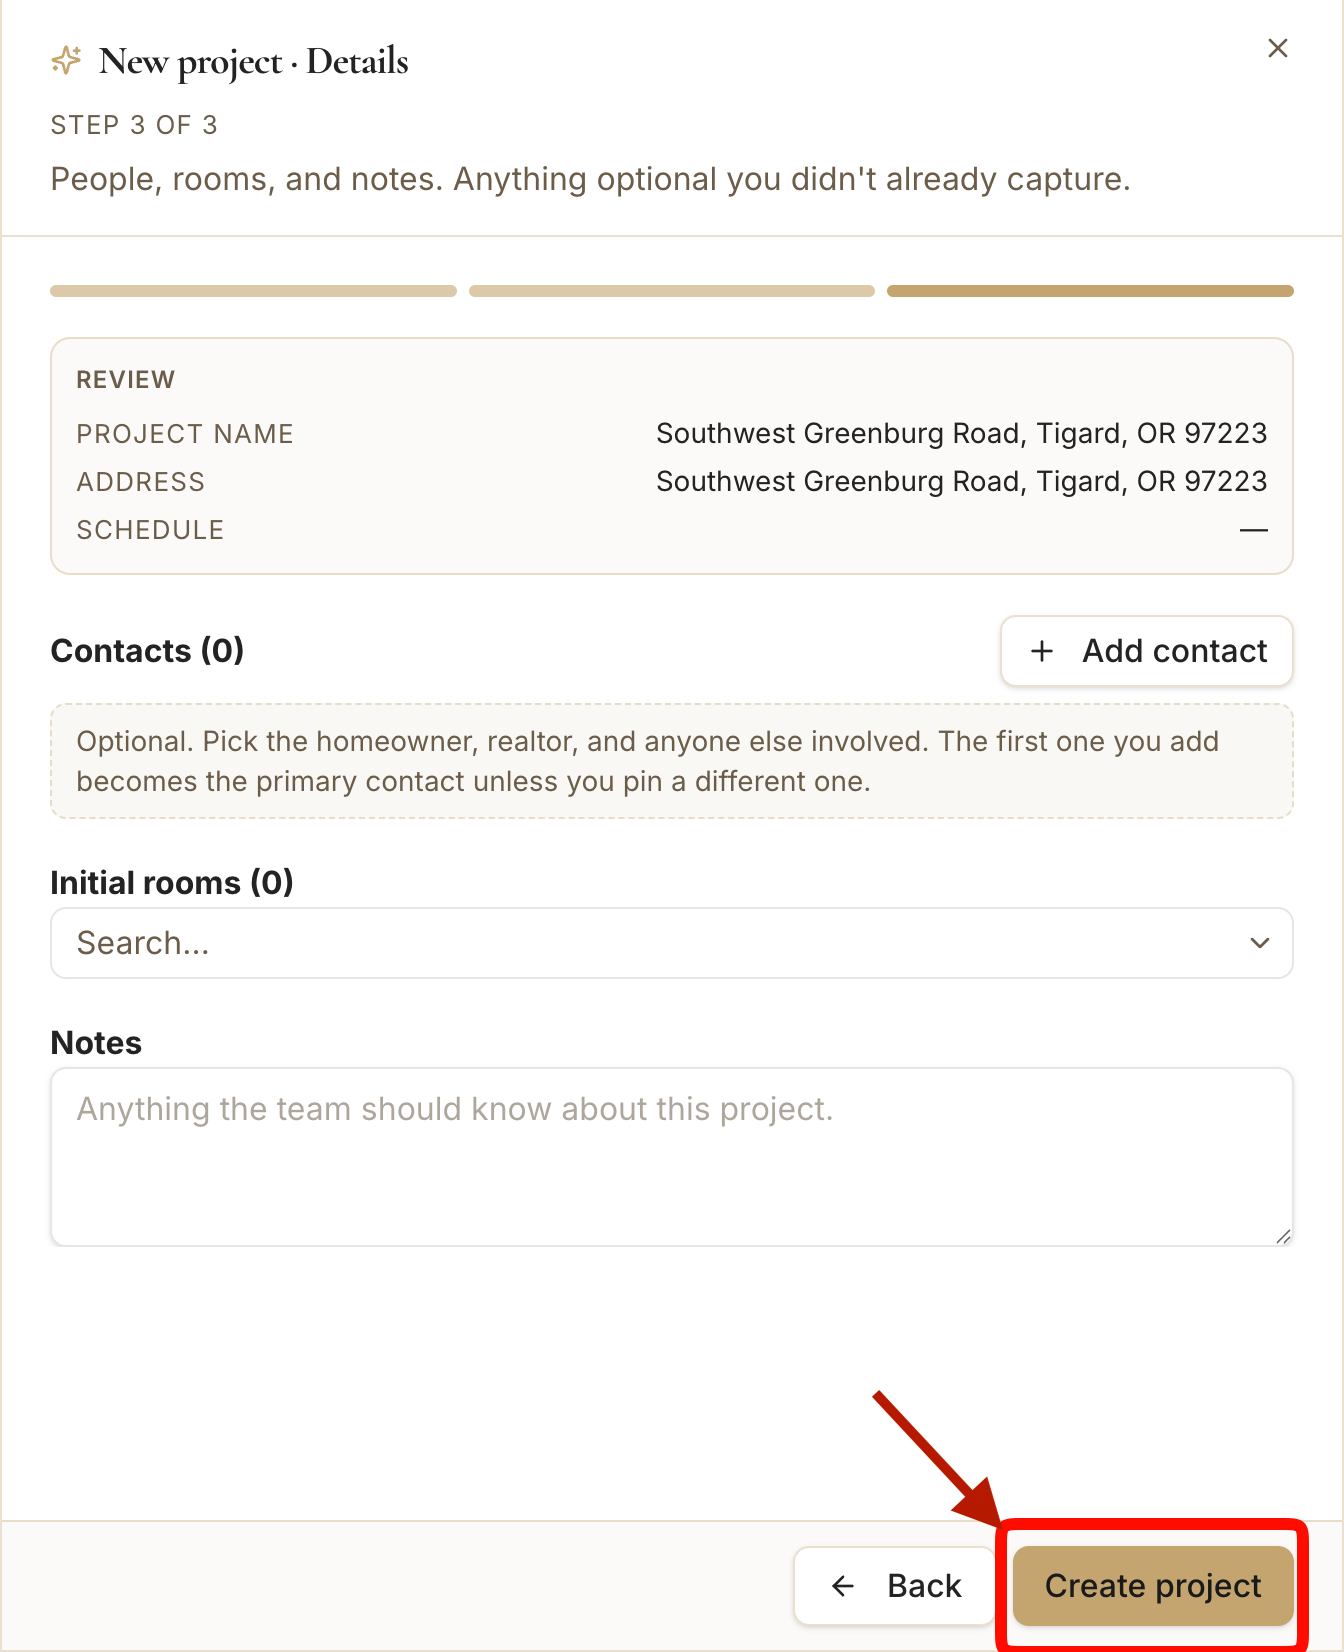
Tips
- Pick the address from Google Places so the structured fields lock in automatically.
- The Loading Date auto-fills from your workspace defaults — adjust it only when a job needs it.
- Contacts, rooms, and notes are optional at creation — add or change them anytime from the project later.
Still need help?
Can't find what you're looking for? Our team is here.