
Edit a product
Open any piece to edit its details, manage its units, send it to staging, read its full history — or remove it.
Open in Stageory- 1
Open Inventory
Your full catalog.
- In the left sidebar, under Inventory System, click Inventory.
- The catalog opens showing every product in grid or list view.
app.stageory.com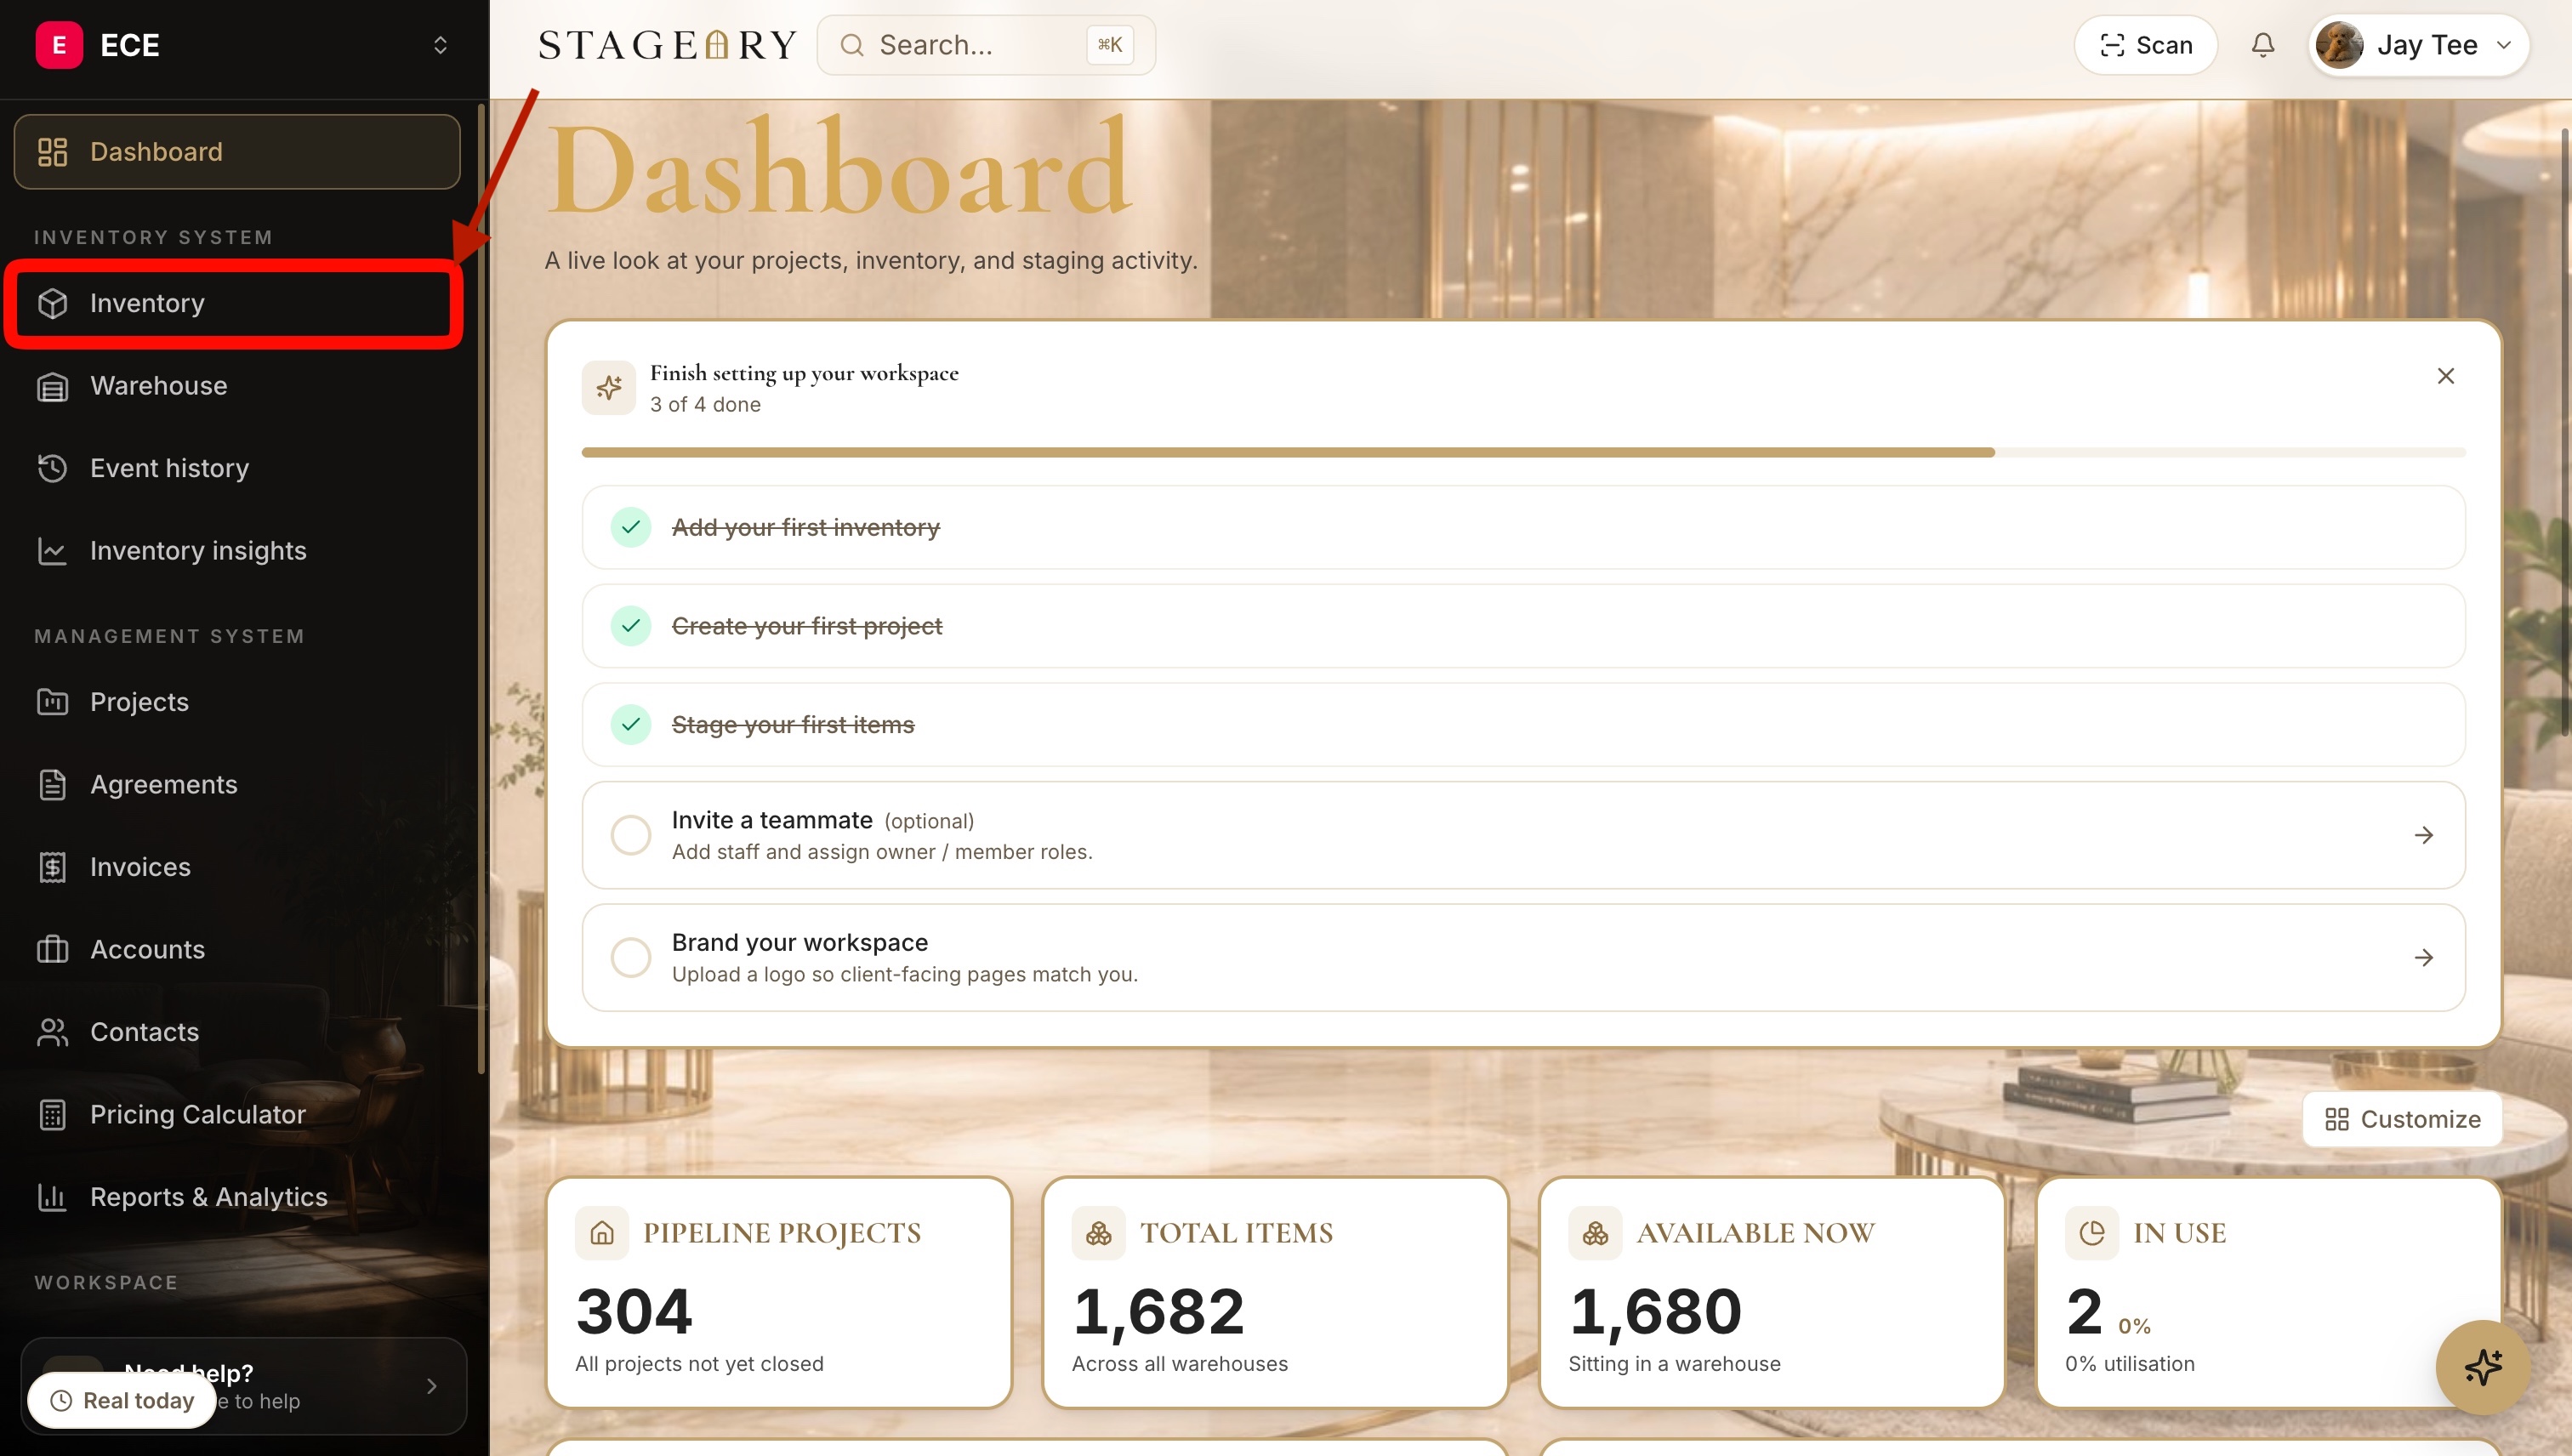
- 2
Select a product
Pick the piece to manage.
- Find the product you want and click its card (e.g. Quotation art).
- The product detail panel opens with all of its current information.
app.stageory.com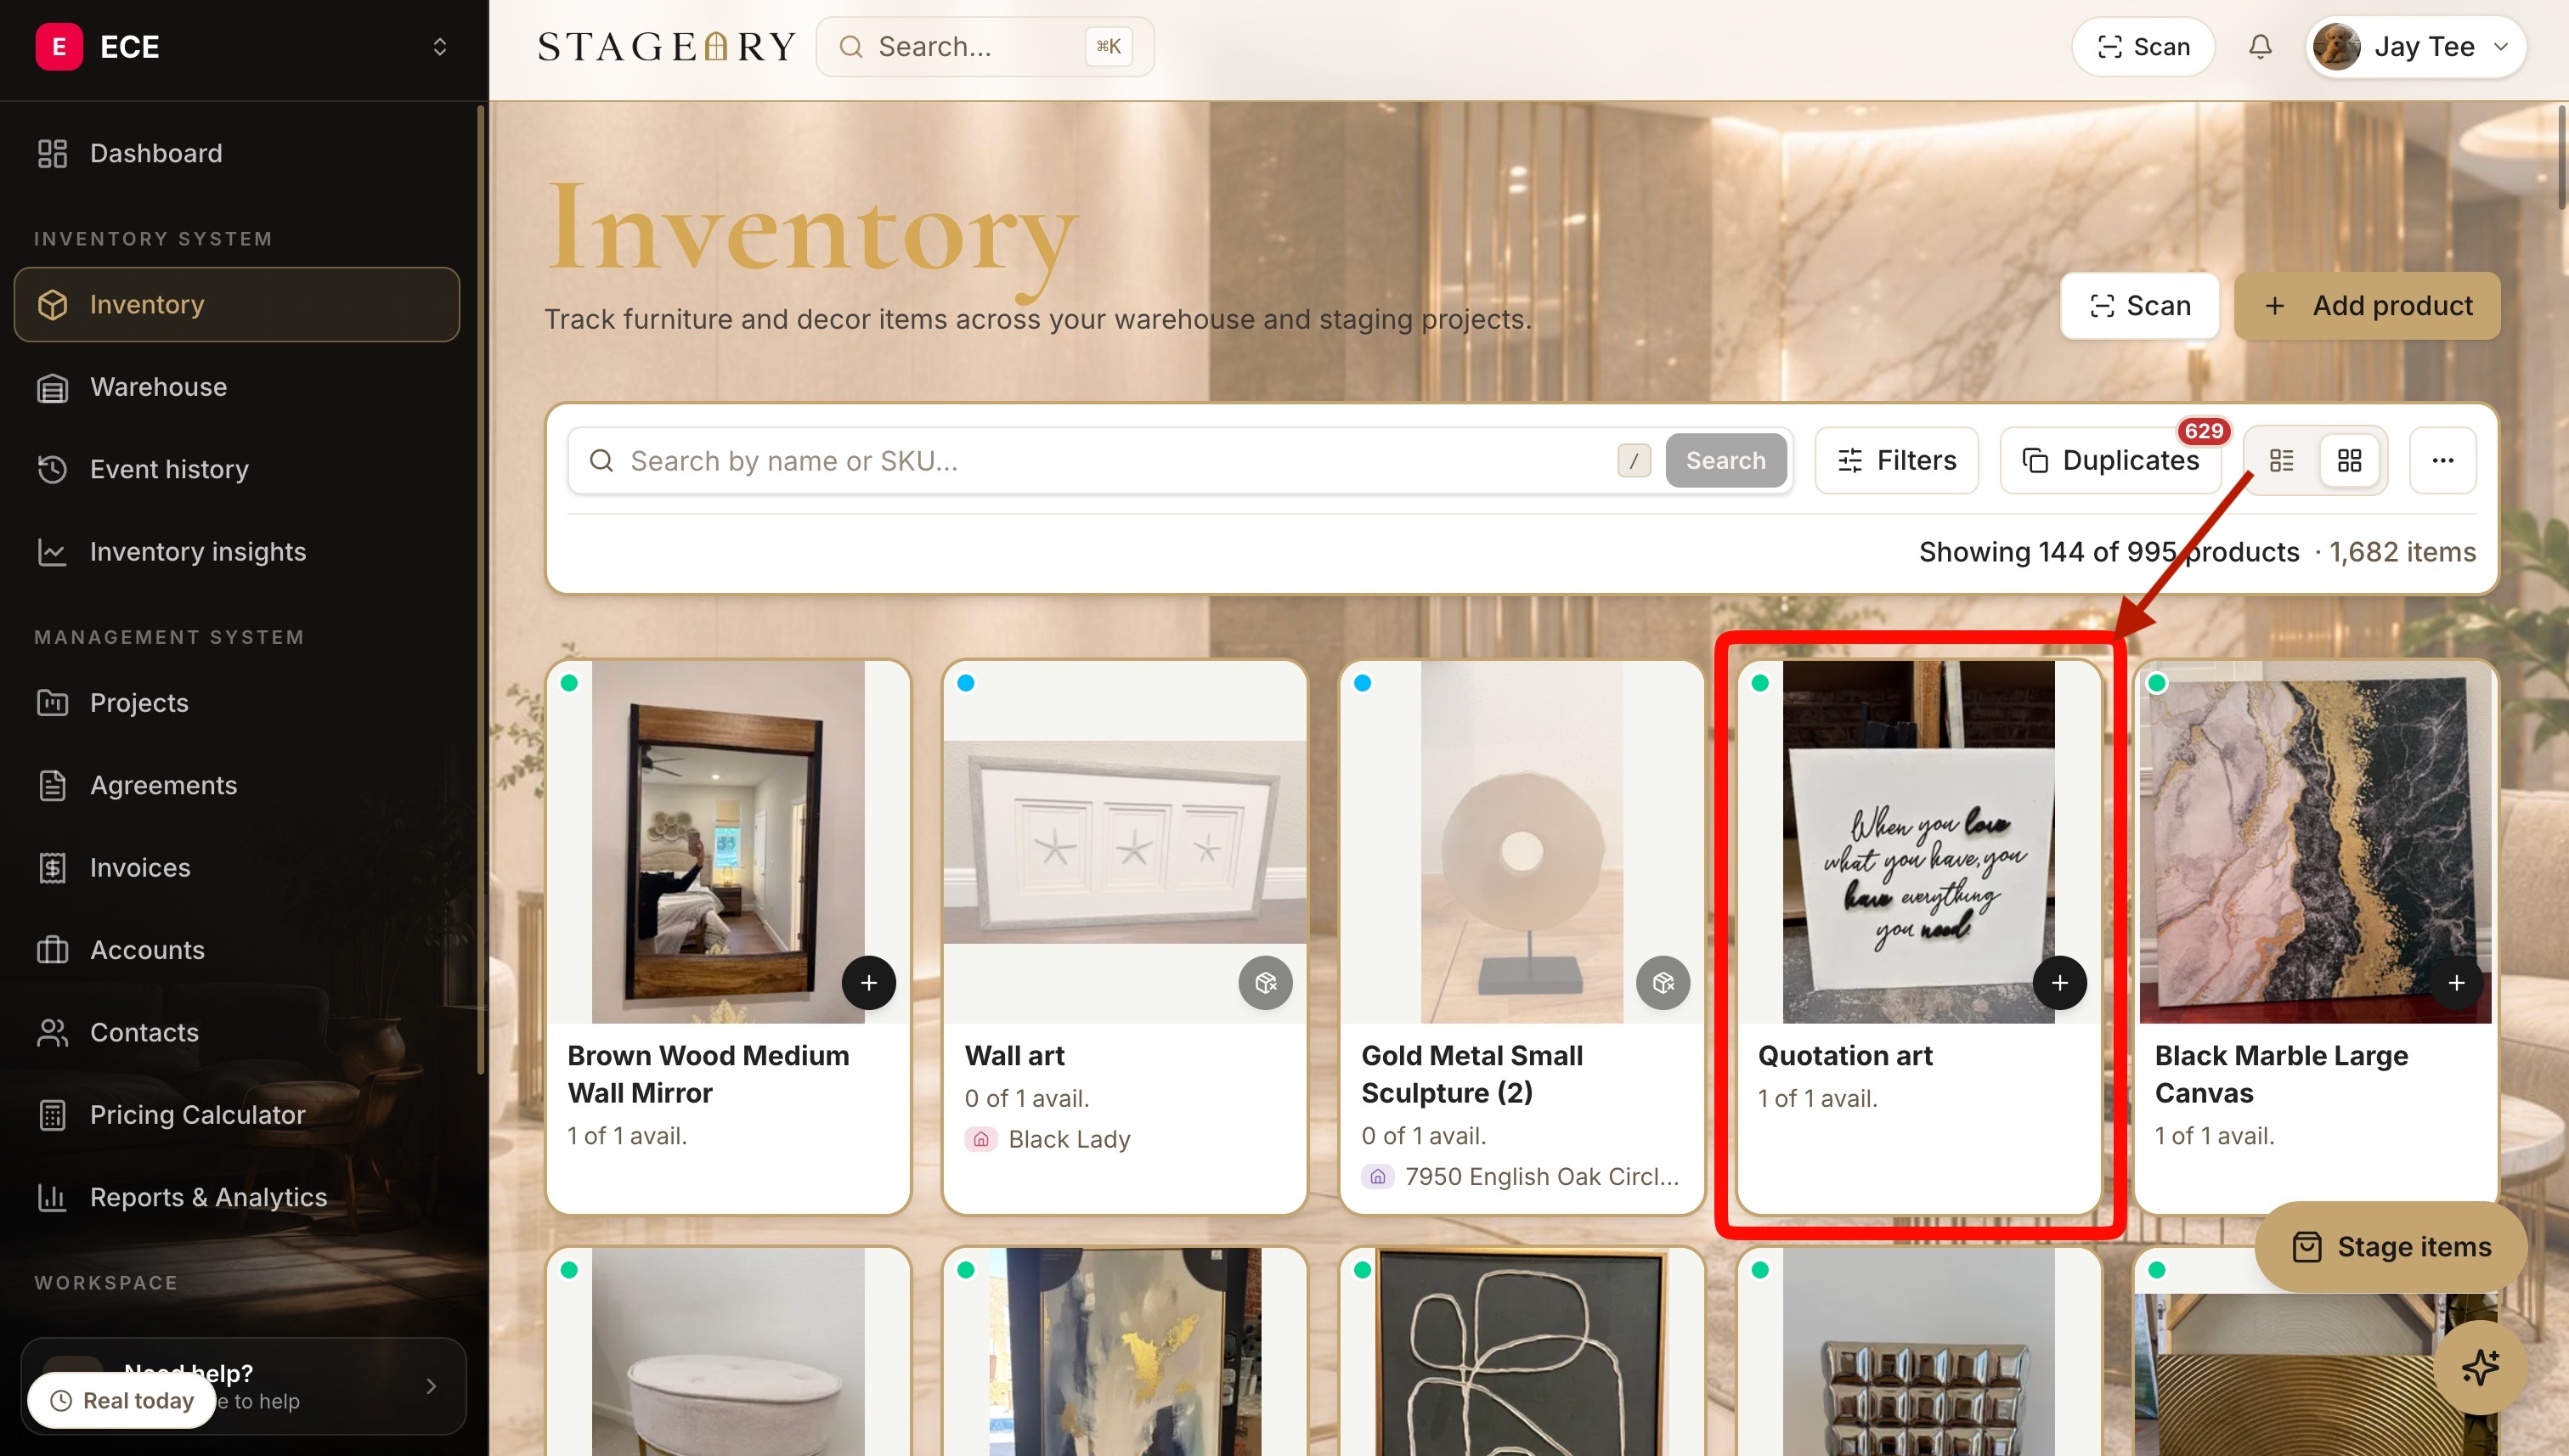
- 3
Update product information
Edit on the Details tab.
- On the Details tab, edit the basics — Display Name, Categories, Vendor, Material, Size, Type, SKU, Palette, Collections, and Notes.
- Add specs too: Dimensions (W × D × H), Purchased date, and the warehouse Storage location.
- Fields are editable inline — changes show immediately. The tabs across the top are Details, Pricing, Inventory, History, Related, and Danger zone.
app.stageory.com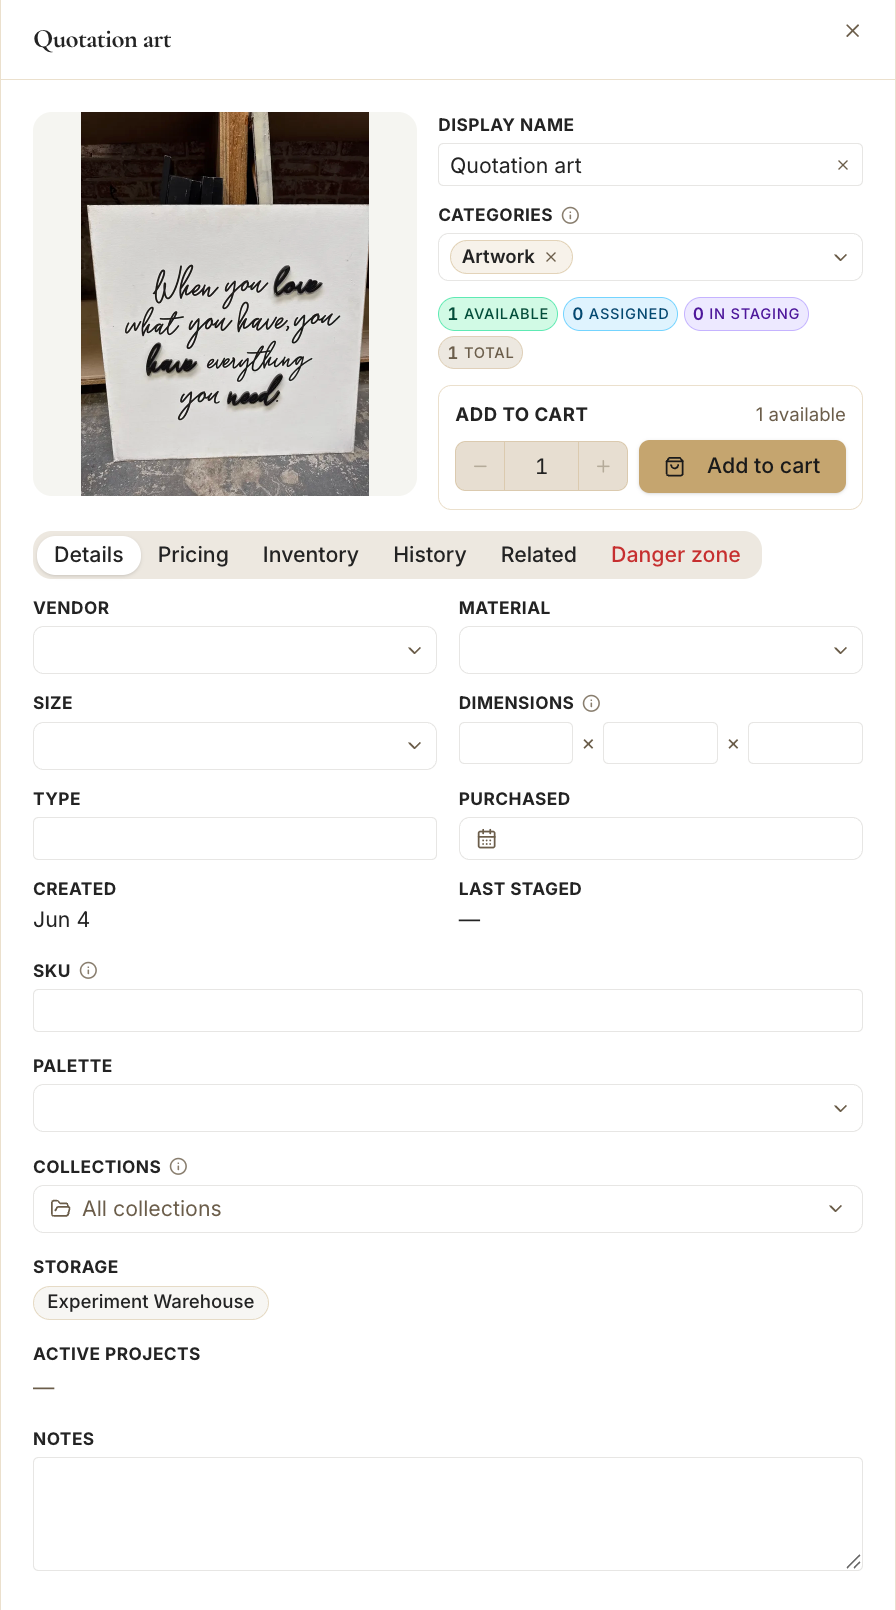
- 4
Manage inventory units
Item-level stock.
- Open the Inventory tab to see every physical unit linked to this product.
- Check each unit's warehouse location, QR tag, availability status, and any staging assignment.
app.stageory.com - 5
Add the product to a cart
Send it to staging.
- In the Add to cart box, set the quantity with the + / − controls.
- Click Add to cart — the chosen quantity goes to the staging cart and the cart count updates.
app.stageory.com - 6
Review its history
Every move, logged.
- Open the History tab to see the piece's timeline: creation date, inventory movements, warehouse transfers, staging activity, and assignment history — in chronological order.
app.stageory.com - 7
Delete the product
Danger zone.
- To remove a piece for good, open the Danger zone tab and delete it.
- A confirmation dialog appears first — the product is removed only after you confirm.
app.stageory.com
Tips
- The status pills at the top — Available, Assigned, In staging, Total — give you the unit counts at a glance.
- Use Event history in the sidebar to track movement across every item at once.
- Deleting from the Danger zone is permanent — unassign or archive instead if you might need the piece again.
Still need help?
Can't find what you're looking for? Our team is here.